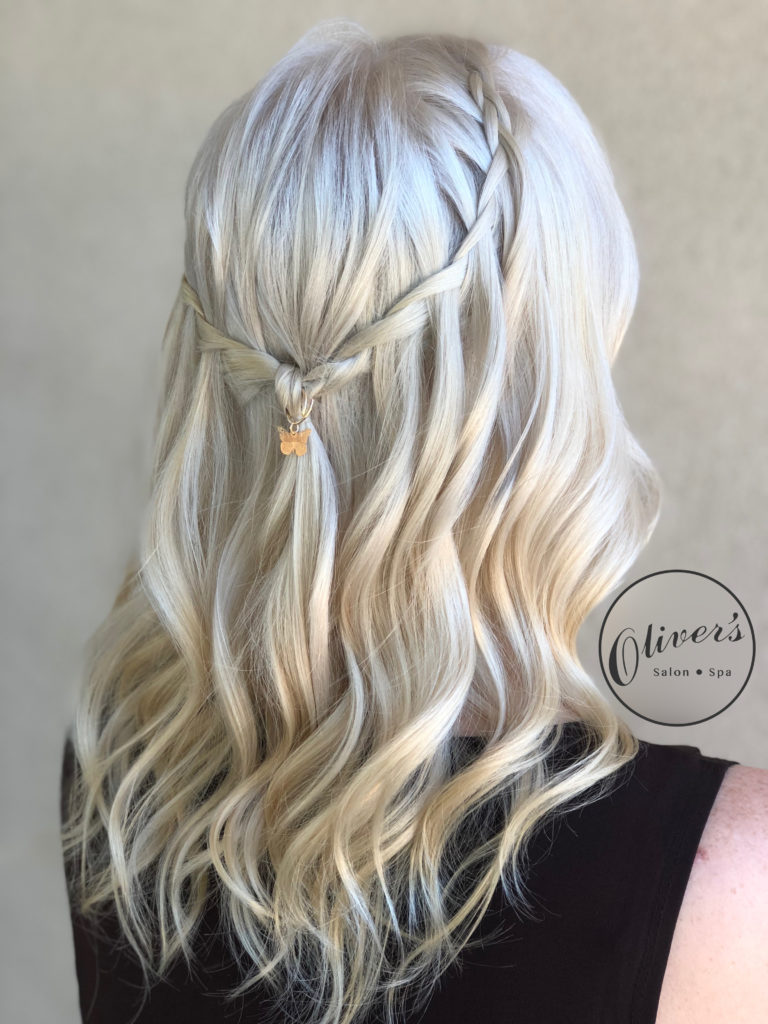
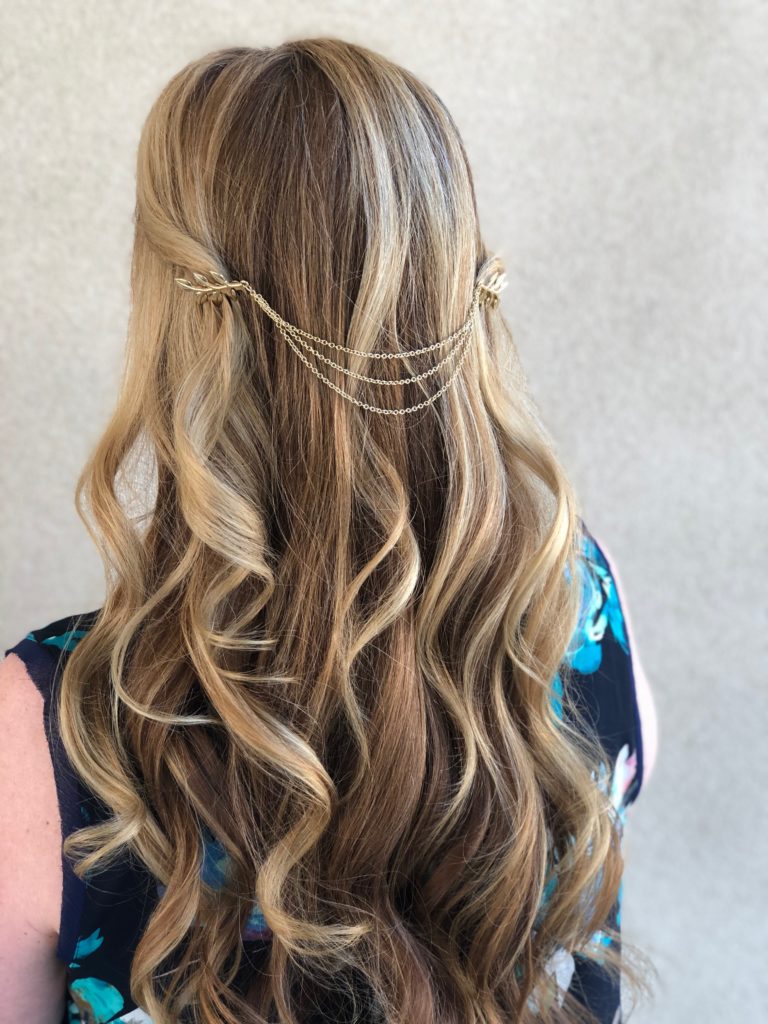
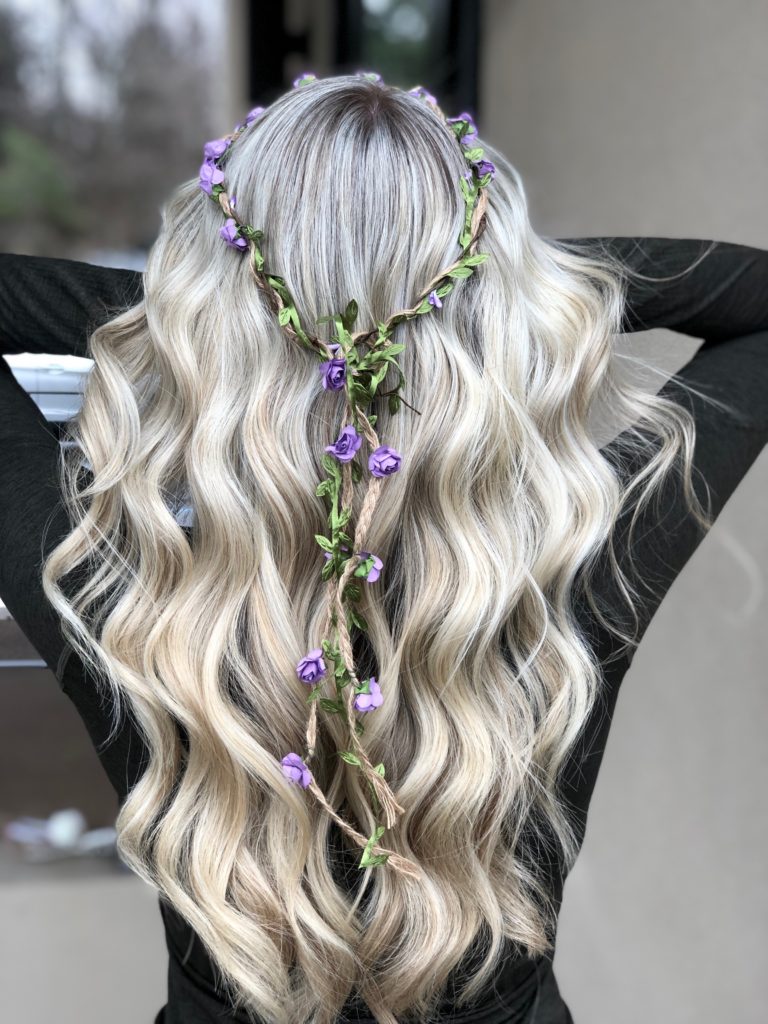
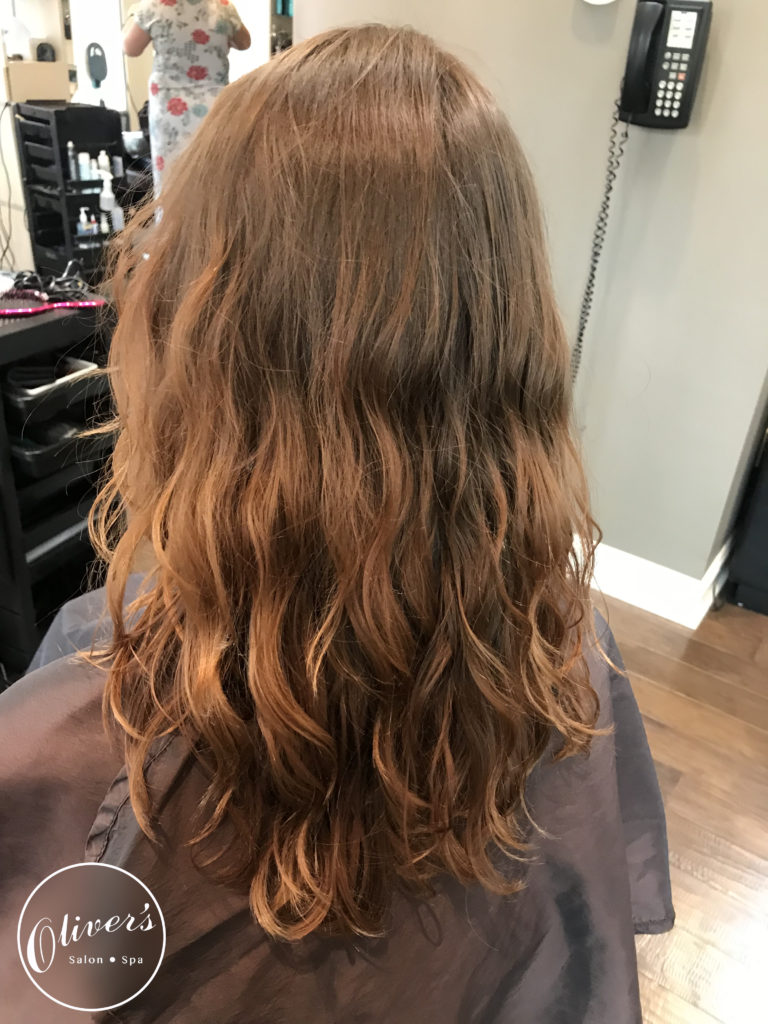
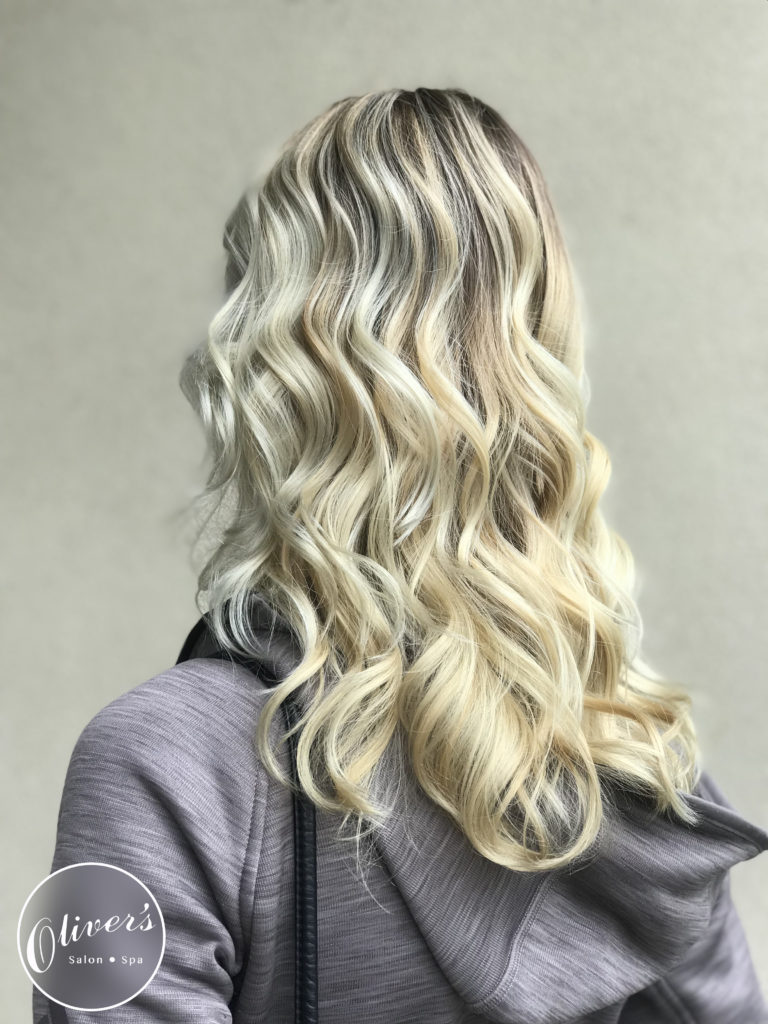
Posts by Tejya
The Lazy Girl’s Guide to Long Lashes
Mascara is my most dreaded (but also most essential) part of my beauty routine. Mascara is one of the most widely used makeup products by people of all ages and skill levels. Not everyone contours or “bakes” their faces on a daily basis, but mascara is an easy one-step way to look more glamorous with minimal effort. However, it comes with its own set of challenges. Apply too much, and you’re left with sticky spider-leg eyelashes that are only appropriate for October 31st. Less than immaculate job taking off your makeup off after a long day? Wake up looking like a raccoon every time. And don’t even get me started on bottom lashes.
Eyelash extensions have been making major waves in the beauty community due to their ease, customizable look and longevity. In this post, I’m going to talk about eyelash extensions and how they’re a great option to boost your look with minimal daily effort.
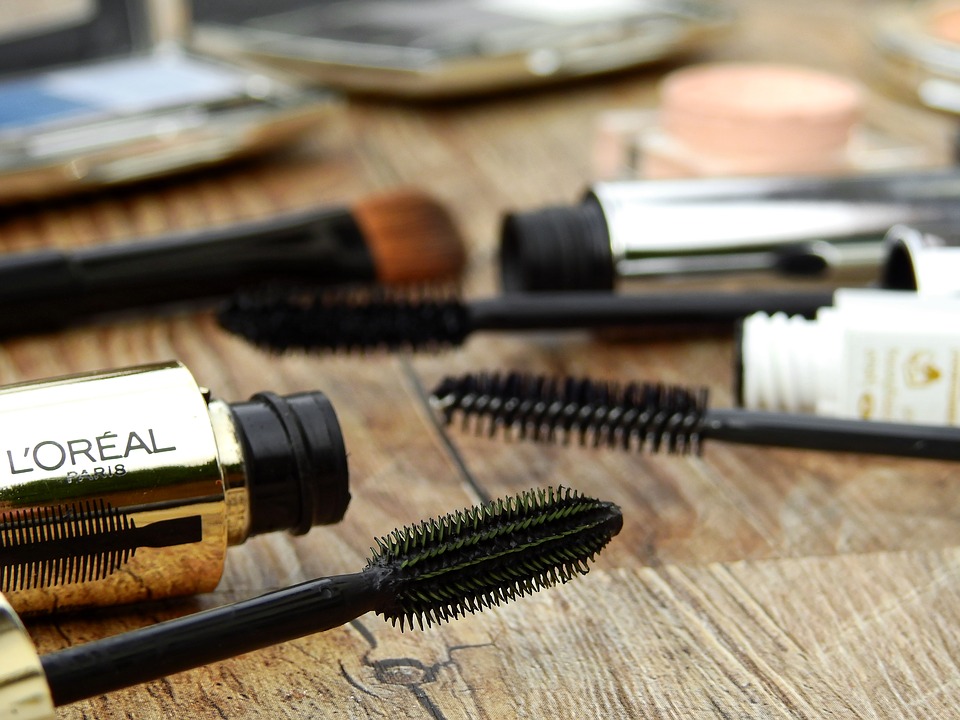
It seems like I'm stuck buying new mascara constantly, only for it to get dried out after less than a month. If digging through your makeup bag to find your one tube of mascara that's not on it's last legs is getting a little old, eyelash extensions might be the next best step.
Since I’ve already complained about mascara, I should also mention that I can’t apply a strip lash to save my life. Time and time again I’ve spent over an hour on a makeup look, only to destroy it by nearly gluing my eyelid shut with a severely misplaced lash. Strip lashes, while cost effective, are often difficult to apply and don’t have a large enough range of styles to accommodate every eye shape. Everyone has a different natural eye shape, so the one-size-fits-all bands of false eyelashes hardly fit everyone.
So if you're like me and feeling a little let down by the lash products on the market, here are:
5 Reasons To Ditch The Falsies
1 - Easier Application
A licensed technician applies the eyelash extensions, so all you have to do is lay back and relax. No more struggling with spoolies or eyelash glue.
2 - Prolonged Use
I love makeup, but sometimes the repetition of taking my makeup on and off day after day gets to me. ESPECIALLY when I use a mascara that’s more difficult to remove and I’m left scrubbing at my eyelids until they’re as irritated as I am. So, going to sleep and waking up with perfect eyelashes is more than a little appealing.
3 - Customizable Look
The lash technician applies one lash at a time, so you are able to decide exactly how dramatic or natural you want the final product to be. You can tailor extensions to your exact eye shape, which makes them way better than strip lashes.
4 - Less Time Getting Ready
For me, mascara takes fairly long to apply. Day to day I don’t wear much makeup, but I have naturally short and sparse lashes so I always have to apply at least a couple coats of mascara. I’d essentially be wearing zero makeup every day without this step in my routine, which would be a dream come true.
5 - Won’t Damage Natural Lashes
When taken care of properly, eyelash extensions won’t damage your natural lashes. So, if you get them and decide they aren’t for you, either wait for them to fall out naturally or have them professionally removed. (But please DON’T try to remove them yourself unless you want your real lashes to suffer.)
Application
Before you can get beautiful fluffy lashes, you’ll need to book a consultation. At Oliver’s, all of our semi-permanent makeup appointments require a consultation. If you’re unsure about what a consultation is, check out my blog on them here. Consultations are an important part of many beauty services, so you can ensure that your appointment goes perfectly. During this appointment, you and your lash technician will go over your desired lash style, appointment time and pricing. After your consultation, you'll have the initial application appointment for your lashes. In this appointment, all you have to do is sit back and relax with your eyes closed. Easy enough, right? Eyelash applications are painless and you may even be able to doze off a little bit if you’re comfy enough.
Aftercare
Aftercare for eyelash extensions is fairly simple. Avoid getting your eyelash extensions wet for 24 to 48 hours following both your initial application and any touch ups. To make sure your lashes stay exactly where the technician placed them, the glue must be completely dried. You should also brush out your lashes after waking up with a spoolie to make sure they stay in the shape you want them.
But Can I Still Wear Makeup With Eyelash Extensions?
Yes, you can still wear makeup. When removing, avoid scrubbing the eye area and instead opt for gentle circular motions with a makeup wipe. However, make sure you STAY AWAY from mascara.Yes, you can still wash your face. Just do it carefully, and avoid oil-based removers that will break down the cosmetic glue over time. Yes, you can still hit the beach, swim in a pool and workout. No, you can’t still wear false eyelashes. Applying any glue to your lash line can make your extensions sticky, difficult to clean, and potentially make them fall out. (Plus, you won’t even need them.)
Think Eyelash Extensions Are For You?
I'm always an advocate for a good life-hack, and it seems to me like eyelash extensions are just another great way to save time getting ready. There's so many beauty advancements that can slim down your morning routine, like Keratin Treatments and Microblading. Mornings should be for sleeping and coffee, not struggling with mascara.
Our permanent makeup specialist at Oliver’s has over 15 years experience in microblading, eyelash extensions, and semi-permanent eyeliner. If you’re interested in booking a consultation to receive a permanent makeup application, call us at (610) 366-8808 or book online.
Waxing Your Way To Freedom
Now for an essential but seldom talked about beauty topic: waxing. Almost everyone has let their brows grow out a little too long, or put on a cute new sundress only to be immediately reminded that you didn’t shave your legs. Shaving is a pain to keep up with, and playing Twister in the shower to make sure you don’t leave any awkward patches is tiring. In this post, I’m going to convert you all into diehard waxers, and provide some tips on how to approach your waxing appointments.

Many people are put off from waxing because they think it’ll hurt too much, or the idea of a stranger getting that up close and personal isn’t so appealing. Which is understandable. However, professional waxers won't be intimidated by a hairy underarm or if your brows are a little out of whack. Waxing has a ton of pros and is way more manageable in the long run so it can’t hurt to give it a try. (Metaphorically speaking, of course. Expect a tiny sting.)
Tip 1: Grow Your Hair Out (Let It Grow, Let It Grow)
In order to get the most out of your waxing, you’re going to have to go into untamed territory. While I’m sure the idea of growing your hair out for a couple weeks isn’t appealing to most, it’s a necessity to leave some length so the wax has something to attach to. It’s best to wait 3 to 4 weeks between appointments for best results.
Tip 2: Don't Shave Between Appointments
This is related to the first tip, and just as important. While it may be tempting, if you want to get the best effects from your waxing hold off on shaving between appointments. Waxing pulls the hair out at the root, leaving a smooth surface. Shaving, however, bluntly cuts the hair which causes it to appear darker and thicker when regrowing. While it may be difficult to ditch your razor, if you skip out on shaving between waxes your hair will grow in much finer and eventually be less noticable between appointments.
Tip 3: Give Yourself A Little TLC
It’s good practice to lightly exfoliate and moisturize the day before a waxing appointment. Exfoliating can clear off any lingering dead skin that the wax may cling to, giving your waxer a cleaner slate to use. However, make sure you tread lightly and avoid anything too intense that may cause irritation to your skin. The day of your appointment, stay away from moisturizing or doing anything that may inhibit the wax from performing properly.
Tip 4: Eliminate The Ouch Factor
Worried about the pain? Feel free to take an Ibuprofen or Asprin beforehand. These won’t affect the outcome of your appointment and can give you some peace of mind.
Tip 5: Let Your Aesthetician Know Of Any Medications You’re Taking
Certain medications can affect your skin sensitivity and texture. Make your waxer aware of any medications you’re taking (including topical medicine) in the event that one of them may cause extra irritation or swelling.
Follow these 5 easy steps and you'll be a waxing convert in no time. Preparing for appointments makes your overall experience that much more relaxing and beneficial. Now, here are some pros as to why waxing as a form of hair removal beats out shaving every time.
Longer Lasting Effects and Better Appearance Between Appointments
Like I mentioned before, shaving with a razor cuts hair bluntly, which is what leaves a dark shadow and stubble. Waxing, however, pulls hair out at the root so there’s nothing leftover to ruin your baby soft skin.
Like Fine Wine, Waxing Gets Better With Time
Waxing damages the tiny hair follicles (in a good way) so over time, hair growth diminishes and the pain lessens. The more consistently you choose waxing over shaving, the finer your hair grows in. So if you make the full transition from shaving to waxing, you’ll have less noticeable growth between appointments. However, like I mentioned above, shaving between appointments will set this back.
Less Irritation
Constantly shaving isn't great for your skin, and if you're have sensitive skin, it can lead to irritation and dryness. Waxing is much easier on your skin and won't leave you with any nicks or cuts.
Faster and More Convenient
Remembering to shave weekly is a pain. Being able to wax your hair off in one go is a much better alternative. No one loves to being out and public and realizing they forgot to shave their legs that week.
What Side Of The Waxing/Shaving Debate Are You On?
So, if you’re sick of shaving and want something a little more manageable, waxing is the way to go. Shaving at least once a week is time consuming and only looks perfect immediately after you step out of the shower. Getting waxed takes less time, holds up much longer, and leaves you with smoother skin in the long run. Cutting myself shaving in the shower once a week versus a quick little sting and weeks worth of smoothness? I’ll take those odds any day.
If you want to make your life a little smoother (no pun intended, I swear…) and are interested in booking a waxing appointment, give Oliver’s a call at (610) 366-8808 or book online.
Charity Is In Style
Although our slogan at Oliver’s is “Treat Yourself Well,” we also believe treating others well is just as important. Every business wants to succeed, and the true measure of success is giving back to the community you operate in.
In this post, I’m going to talk about a local charitable fund, Wings 2 Peace. Oliver’s and other local businesses work with Wings 2 Peace to make the Lehigh Valley a better place for our neighbors.
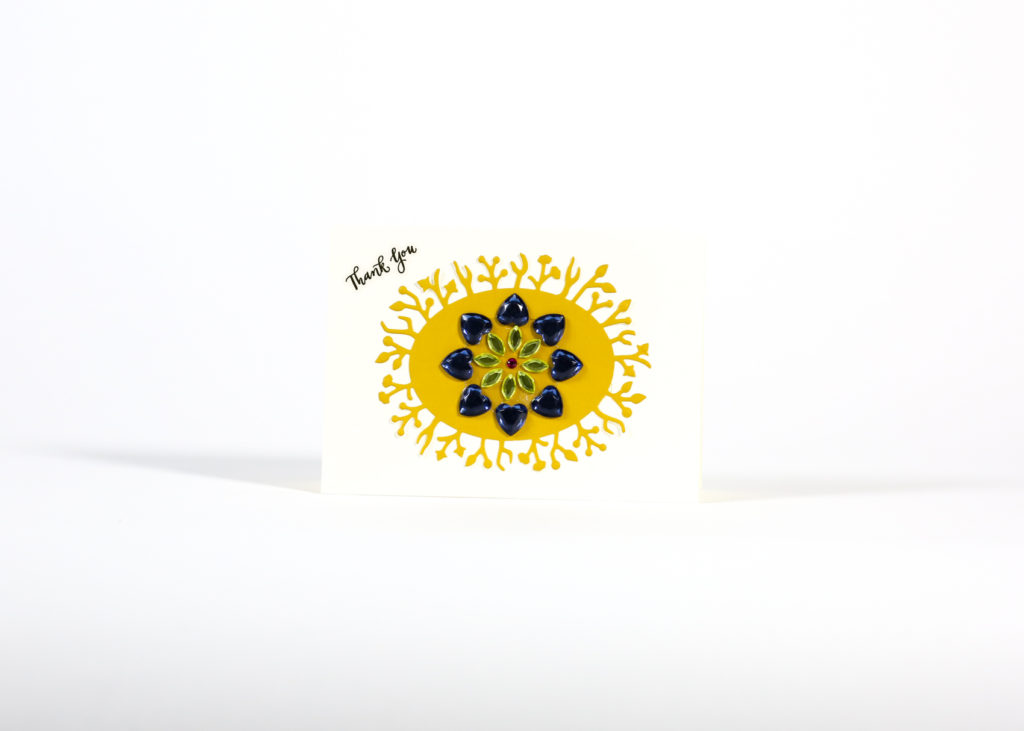
Here is one of the beautiful handmade cards created for the Wings 2 Peace charitable fund. Susan Christine (owner and co-founder of Wings 2 Peace) hand designs and creates each card.
Hospitals, despite their best efforts, are often scary and unfamiliar. This fear is compounded even more when the patient is a child. In tough medical times, there is no comparison to the feeling of one’s own home. Wings 2 Peace charitable fund strives to improve hospice care at Lehigh Valley Health Network for Pediatric, Pediatric Hospice and Inpatient Hospice patients.
The Woman Behind the Cause
Susan Christine, a former registered nurse, business owner and fund raiser, co-founded Wings 2 Peace in 2014. Susan has always spent her time caring for others. While she was a nurse, she worked in critical care, oncology, post-anesthesia and the burn center. Along with her medical career, she is also a dedicated volunteer in the Lehigh Valley. Susan was a tremendous help to the American Cancer Society Lehigh Valley as well as Lehigh Valley Health Network’s Inpatient Hospice Unit. Wanting to share giving opportunities with even more people, Susan created Wings 2 Peace following her retirement.
The Charitable Fund
Wings 2 Peace donates 100% of gross proceeds from selling hand-designed greeting cards exclusively to Lehigh Valley Health Network. Donations to the fund go towards making those in hospice as comfortable as possible by providing what founder Susan Christine calls, “The Ritz-Carlton of health care.” She has worked with LVHN on renovations to transform the Inpatient Hospice Unit at Lehigh Valley Hospital-17th Street into a more calming and home-like environment. Amenities include soothing lights, nature-based art and a more comfortable setting for visitors with chairs, throw blankets and quilts.
Making a hospice unit feel less foreign and more like home is a unique way to comfort families and patients in some of their scariest moments. No one understands these moments better than Susan, who has seen firsthand how hospice care can affect a family, and wants to make those delicate times more comfortable for all involved. The children’s lounge in the hospice unit will be filled with crafting materials for children to "share their emotions through art." Much like familiar pictures on your walls at home, these "creations warm hearths and provide consolation.”
Wings 2 Peace uses the butterfly as their logo to symbolize the “transformation from a place of pain and suffering to a place of beauty and peace." The butterfly accurately symbolizes how this charitable fund turns the worst moments into something more positive.
Where Can You Support?
To support this amazing cause, you can either donate directly to the Wings 2 Peace charitable fund on their website or purchase a Wings 2 Peace card from any of the following local businesses. 100% of the proceeds from card sales support Wings 2 Peace charitable fund. Your support will not only help W2P, but local entrepreneurs as well.
Oliver’s Salon & Spa
Our full service salon and spa that offers hair, skin, nail, spa and cosmetic services to fully pamper you.
Susan Bella Jewelry
Four time winner of Best Jewelry Store in the Valley, Susan Bella specializes in a relaxed and personalized jewelry buying experience.
Ross Plants and Flowers
A full service florist, greenhouse and gift shop that has been open since 1938.
BoutiqueToGo
A constantly updated and stylish boutique that sells upscale jewelry, accessories and gifts.
Allentown Appliance
A one-stop-shop for appliances, selling everything from air heating/cooling, grills, refrigeration and other fun gadgets.
Counter Culture
Owned by Allentown Appliance, another great resource for stocking your home with unique, new appliances.
Wings 2 Peace is a great way to directly support the community, small businesses and local families. Donate to the fund to make sure those in their worst times can feel a little bit more at home.
Thank you to Susan for all the work she does in supporting local families in their times of need. If you’re interested in purchasing one of her cards or learning more about her charitable work, Like Wings 2 Peace on Facebook and visit the Wings 2 Peace website.
Oliver’s Take On 3 Social Media Trends
As I’ve written about before, social media platforms are the holy grail of hairstyle inspiration. There are hundreds of thousands of posts across all social media websites, featuring different styles that can send the average person into sensory overload. However, it’s possible to get inspiration from places other than the traditional #hair or #hairstyles pages. Trends pop up everywhere, so I’m going to teach you how to draw some ideas from past social media crazes. In this blog, I’m going to dive into some popular social media trends and buzzwords, then show you how some of the stylist’s at Oliver’s have turned these trends into hairstyles, #nofilteradded.
With so many social media platforms available, there's more than enough inspiration out there for a new look.
Inspiration can come from anywhere, and we all consume enough media to pick up a few ideas to incorporate into our style. Whether its from social media, your favorite TV show, or a podcast you love, fun new style ideas can come from anywhere. Here are some ideas for how to incorporate social media's next hottest hashtag into a new hairstyle.
Here Are 3 Social Media Trends Translated Into Hairstyles:
Trend 1: Unicorns and Mermaids and fairies galore
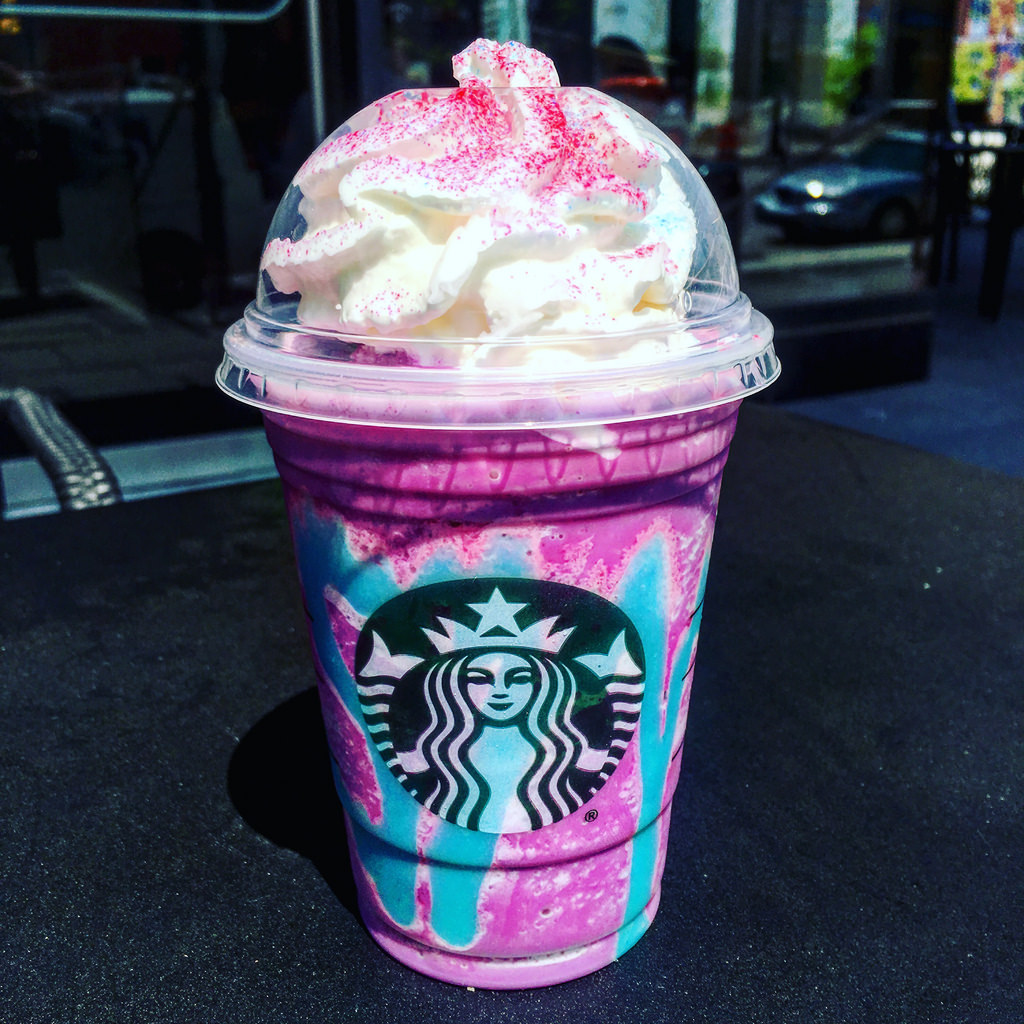
Surely everyone remembers the Starbucks Unicorn Frappucino insanity of 2017. You couldn’t enter a Starbucks without standing in line behind 20 people all asking for the signature purple and teal drink. Snapchat stories were filled to the brim with pictures of it. While the strangely sour frappuccino itself made my wallet $5 lighter and my tastebuds 5 times sadder, it sparked the unicorn craze that’s seeped into everything from clothing, to makeup, to hair ever since. The bright, funky colors made me reminisce to the days of carrying around Lisa Frank folders and having a colored streak in my hair. While I’ve ditched the Manic Panic hair dye and the over the top school supplies, I can still appreciate the unicorn/mermaid/fairy trend.
I’m not sure what about these colors appealed to anyone’s taste buds, but Starbucks gave us some hair and beauty inspiration that’s lasted almost 2 years after the frap was taken off menus.
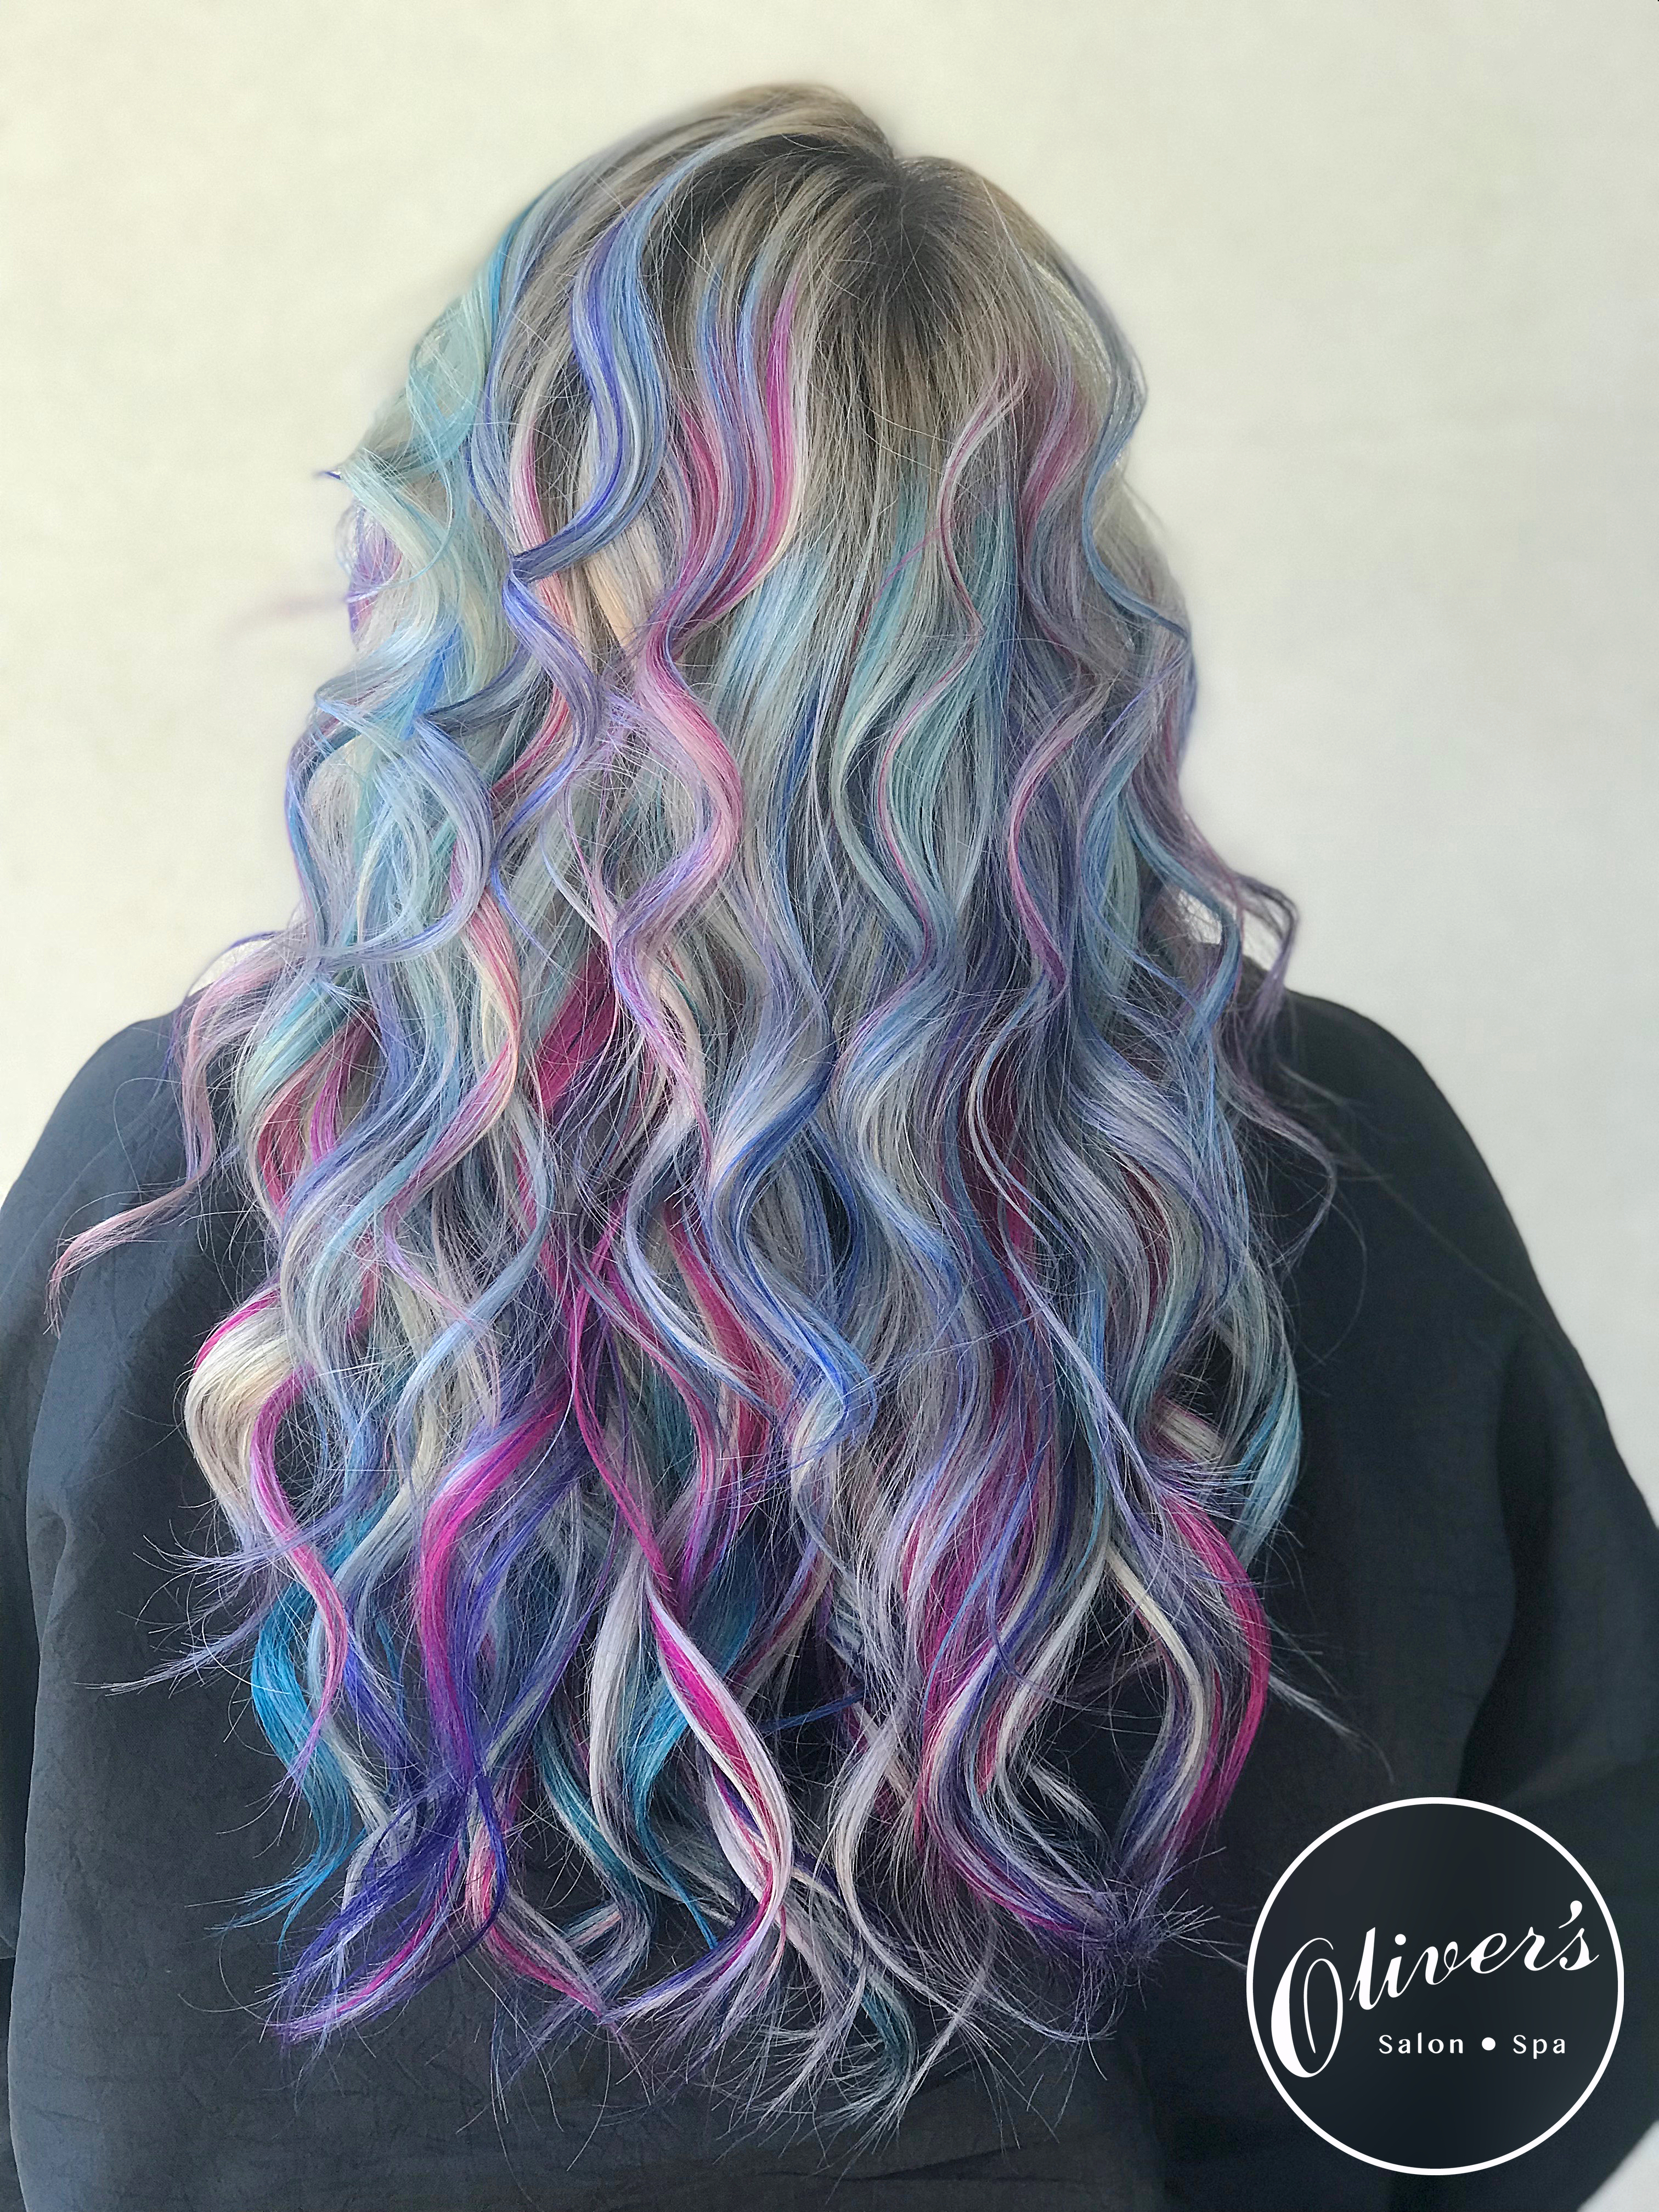
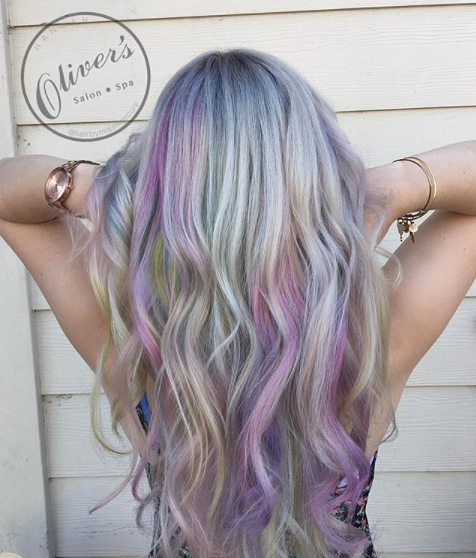
Here are 2 of our stylists' take on the fantasy colors trend, which is definitely much more suited for hair. All of the fun and beauty of the Unicorn Frappucino without the sour aftertaste.
Trend 2: Coachella-palooza-fest
While Coachella may not be the first music festival, there’s no denying its the most Instagram-able. (Is that a word? If not, it should be). Thousands of people flood into California sporting their festival-best makeup, which usually includes lots of sparkles, glitter, and rhinestones. It’s a no brainer that most of these looks aren’t wearable on a daily basis, unless your day job requires you to clock in at the Magic Castle. But, a little added sparkle here or there is definitely doable. Maybe not on your face, but definitely in your hair.
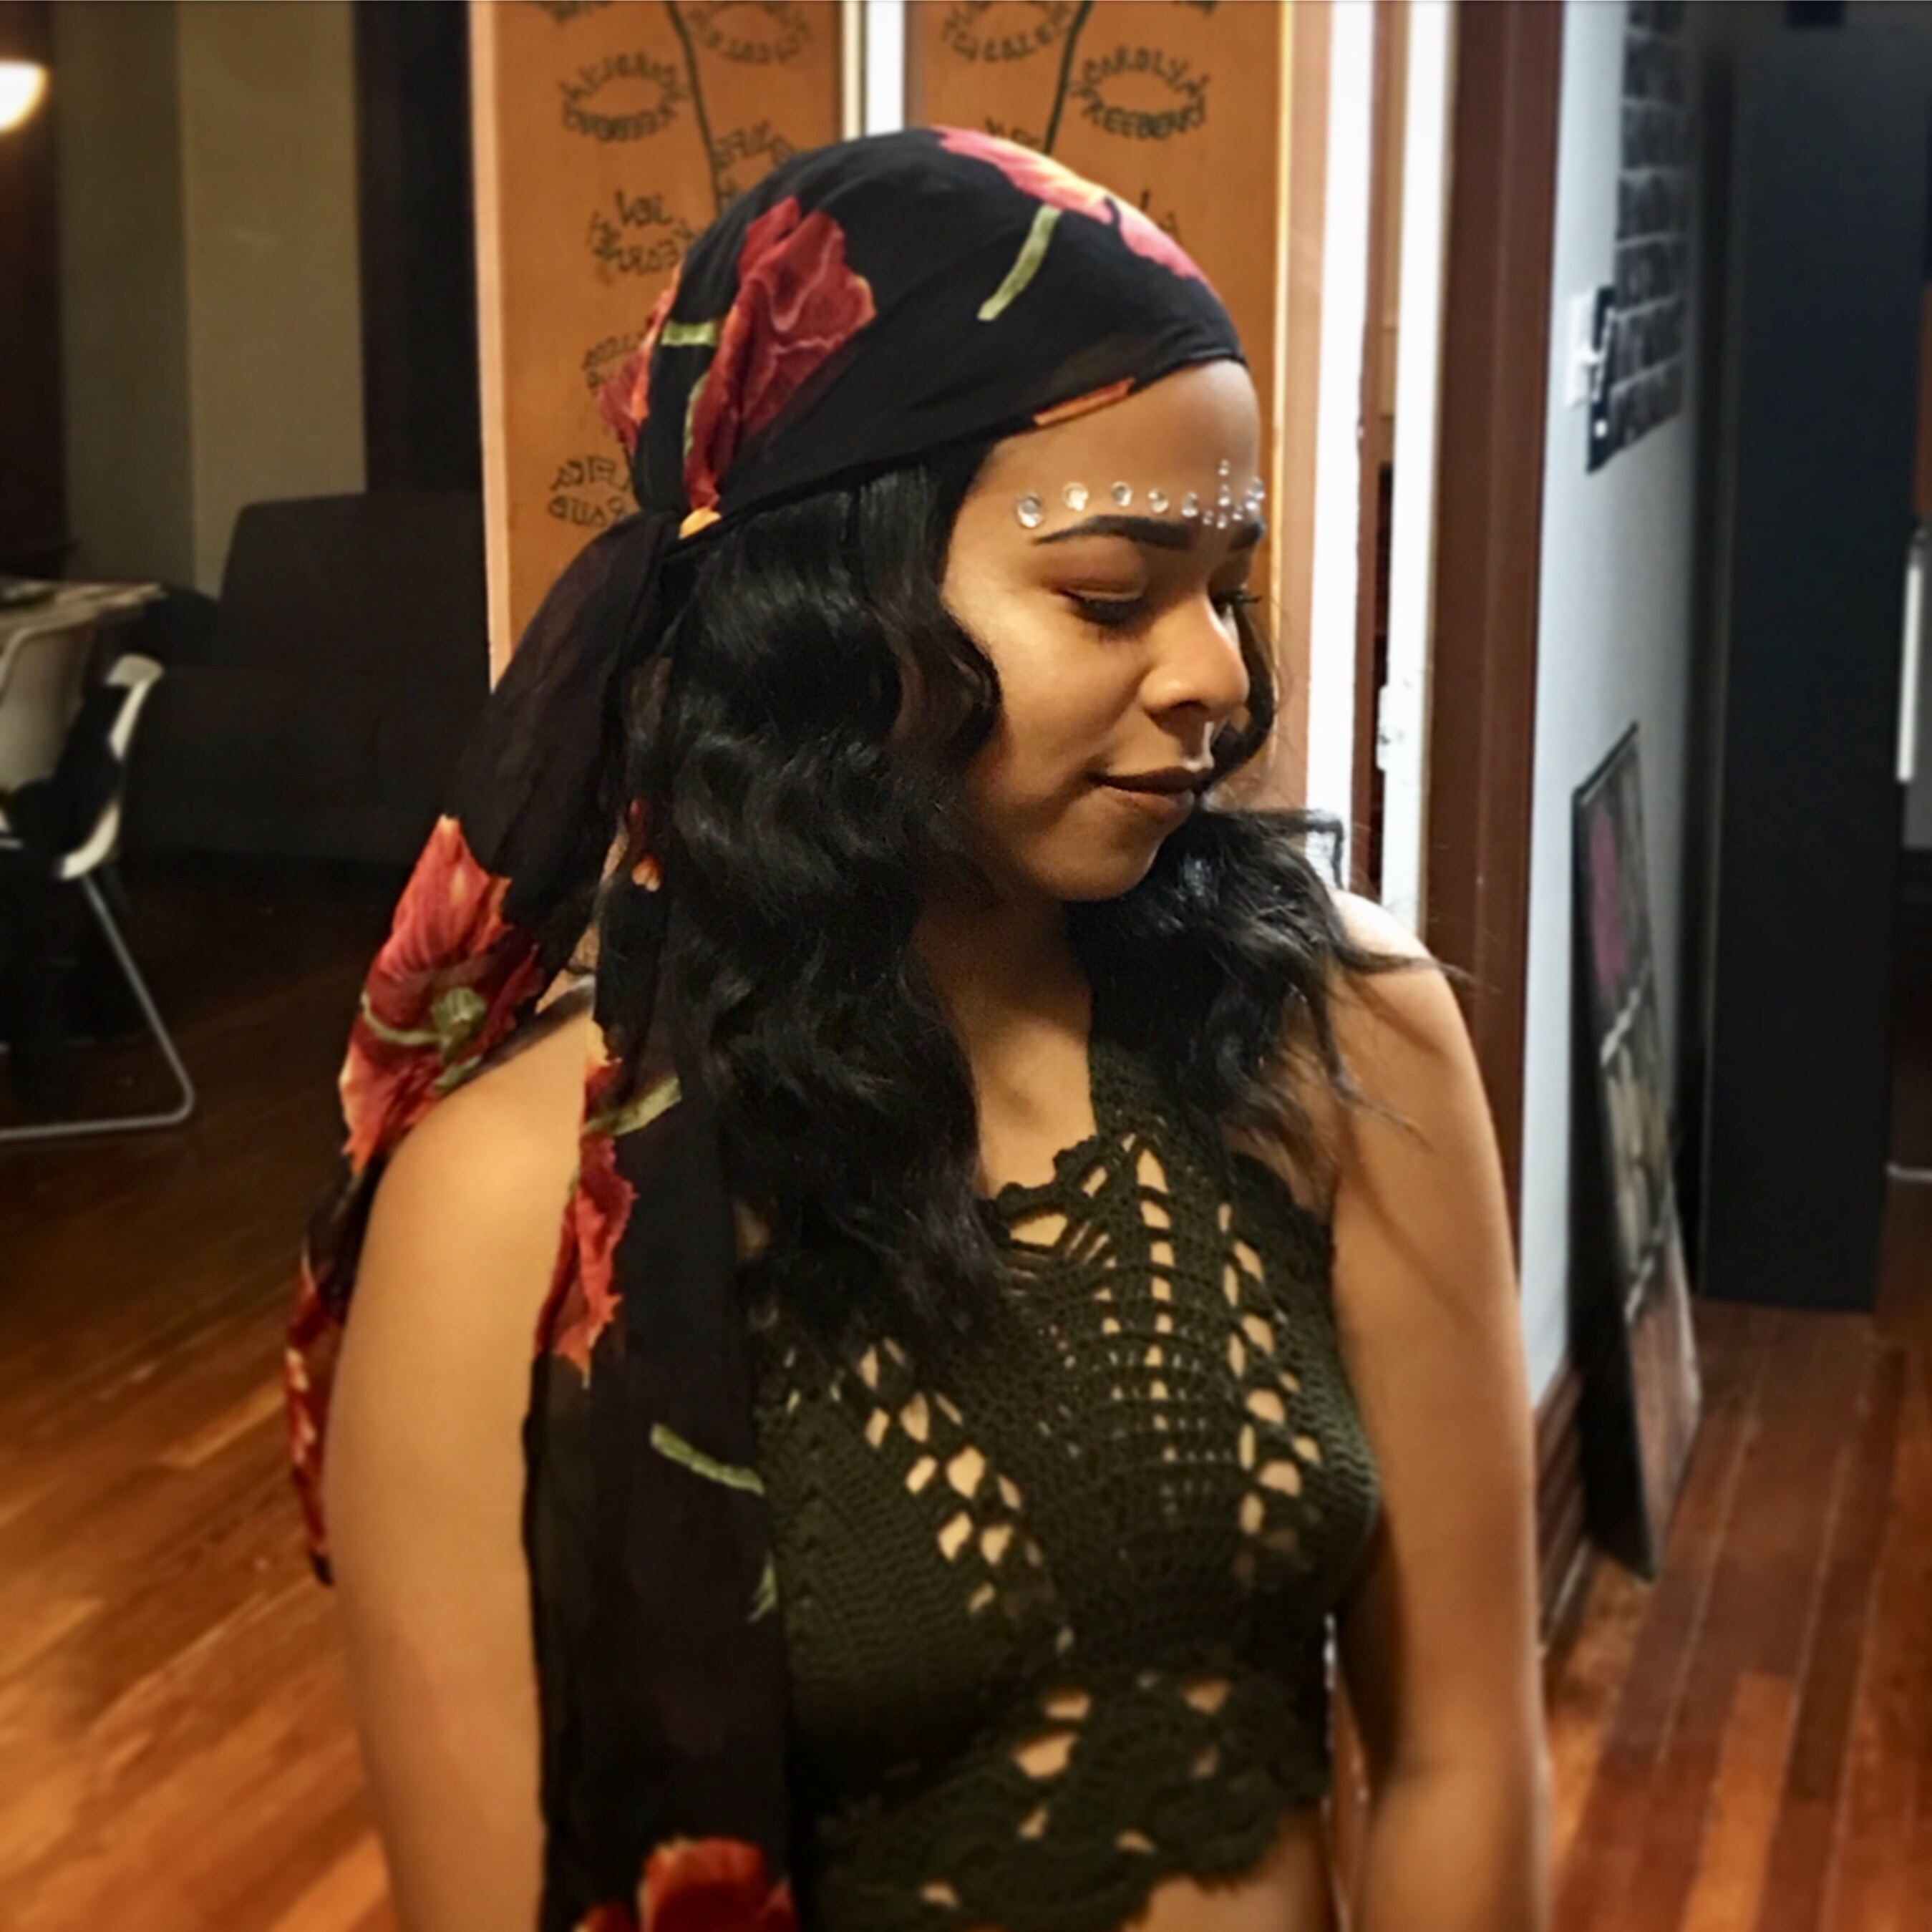
It may not be the best idea to break out the rhinestones and cosmetic glue for your day job, but Coachella-inspired makeup looks are fun for special occasions.
These pretty additions to hairstyles are fun, but subtle enough to wear on a daily basis. Cute add ons like charms and braids are simple, wearable, and give you an added accessory for the day. Our stylists do a great job at incorporating some extra sparkle into everyday looks.
Trend 3: Pretty in Millennial Pink
In 2016, Pantone declared "Rose Quartz" (Also known as “Millennial Pink”) as the color of the year. Shortly after, Apple released the iPhone in Rose Gold. It was (and still is) absolutely everywhere, and I’m guilty of purchasing way too many items in this color. These relaxed pink shades have become more of a neutral color in my wardrobe, rivaling the dozens of black pieces I own. (I know I don’t need every shirt in black but it just goes so easily with everything, I swear!) So, if you’re like me and supplemented your wardrobe with dozens of rosy pieces, maybe your hair is the next step?
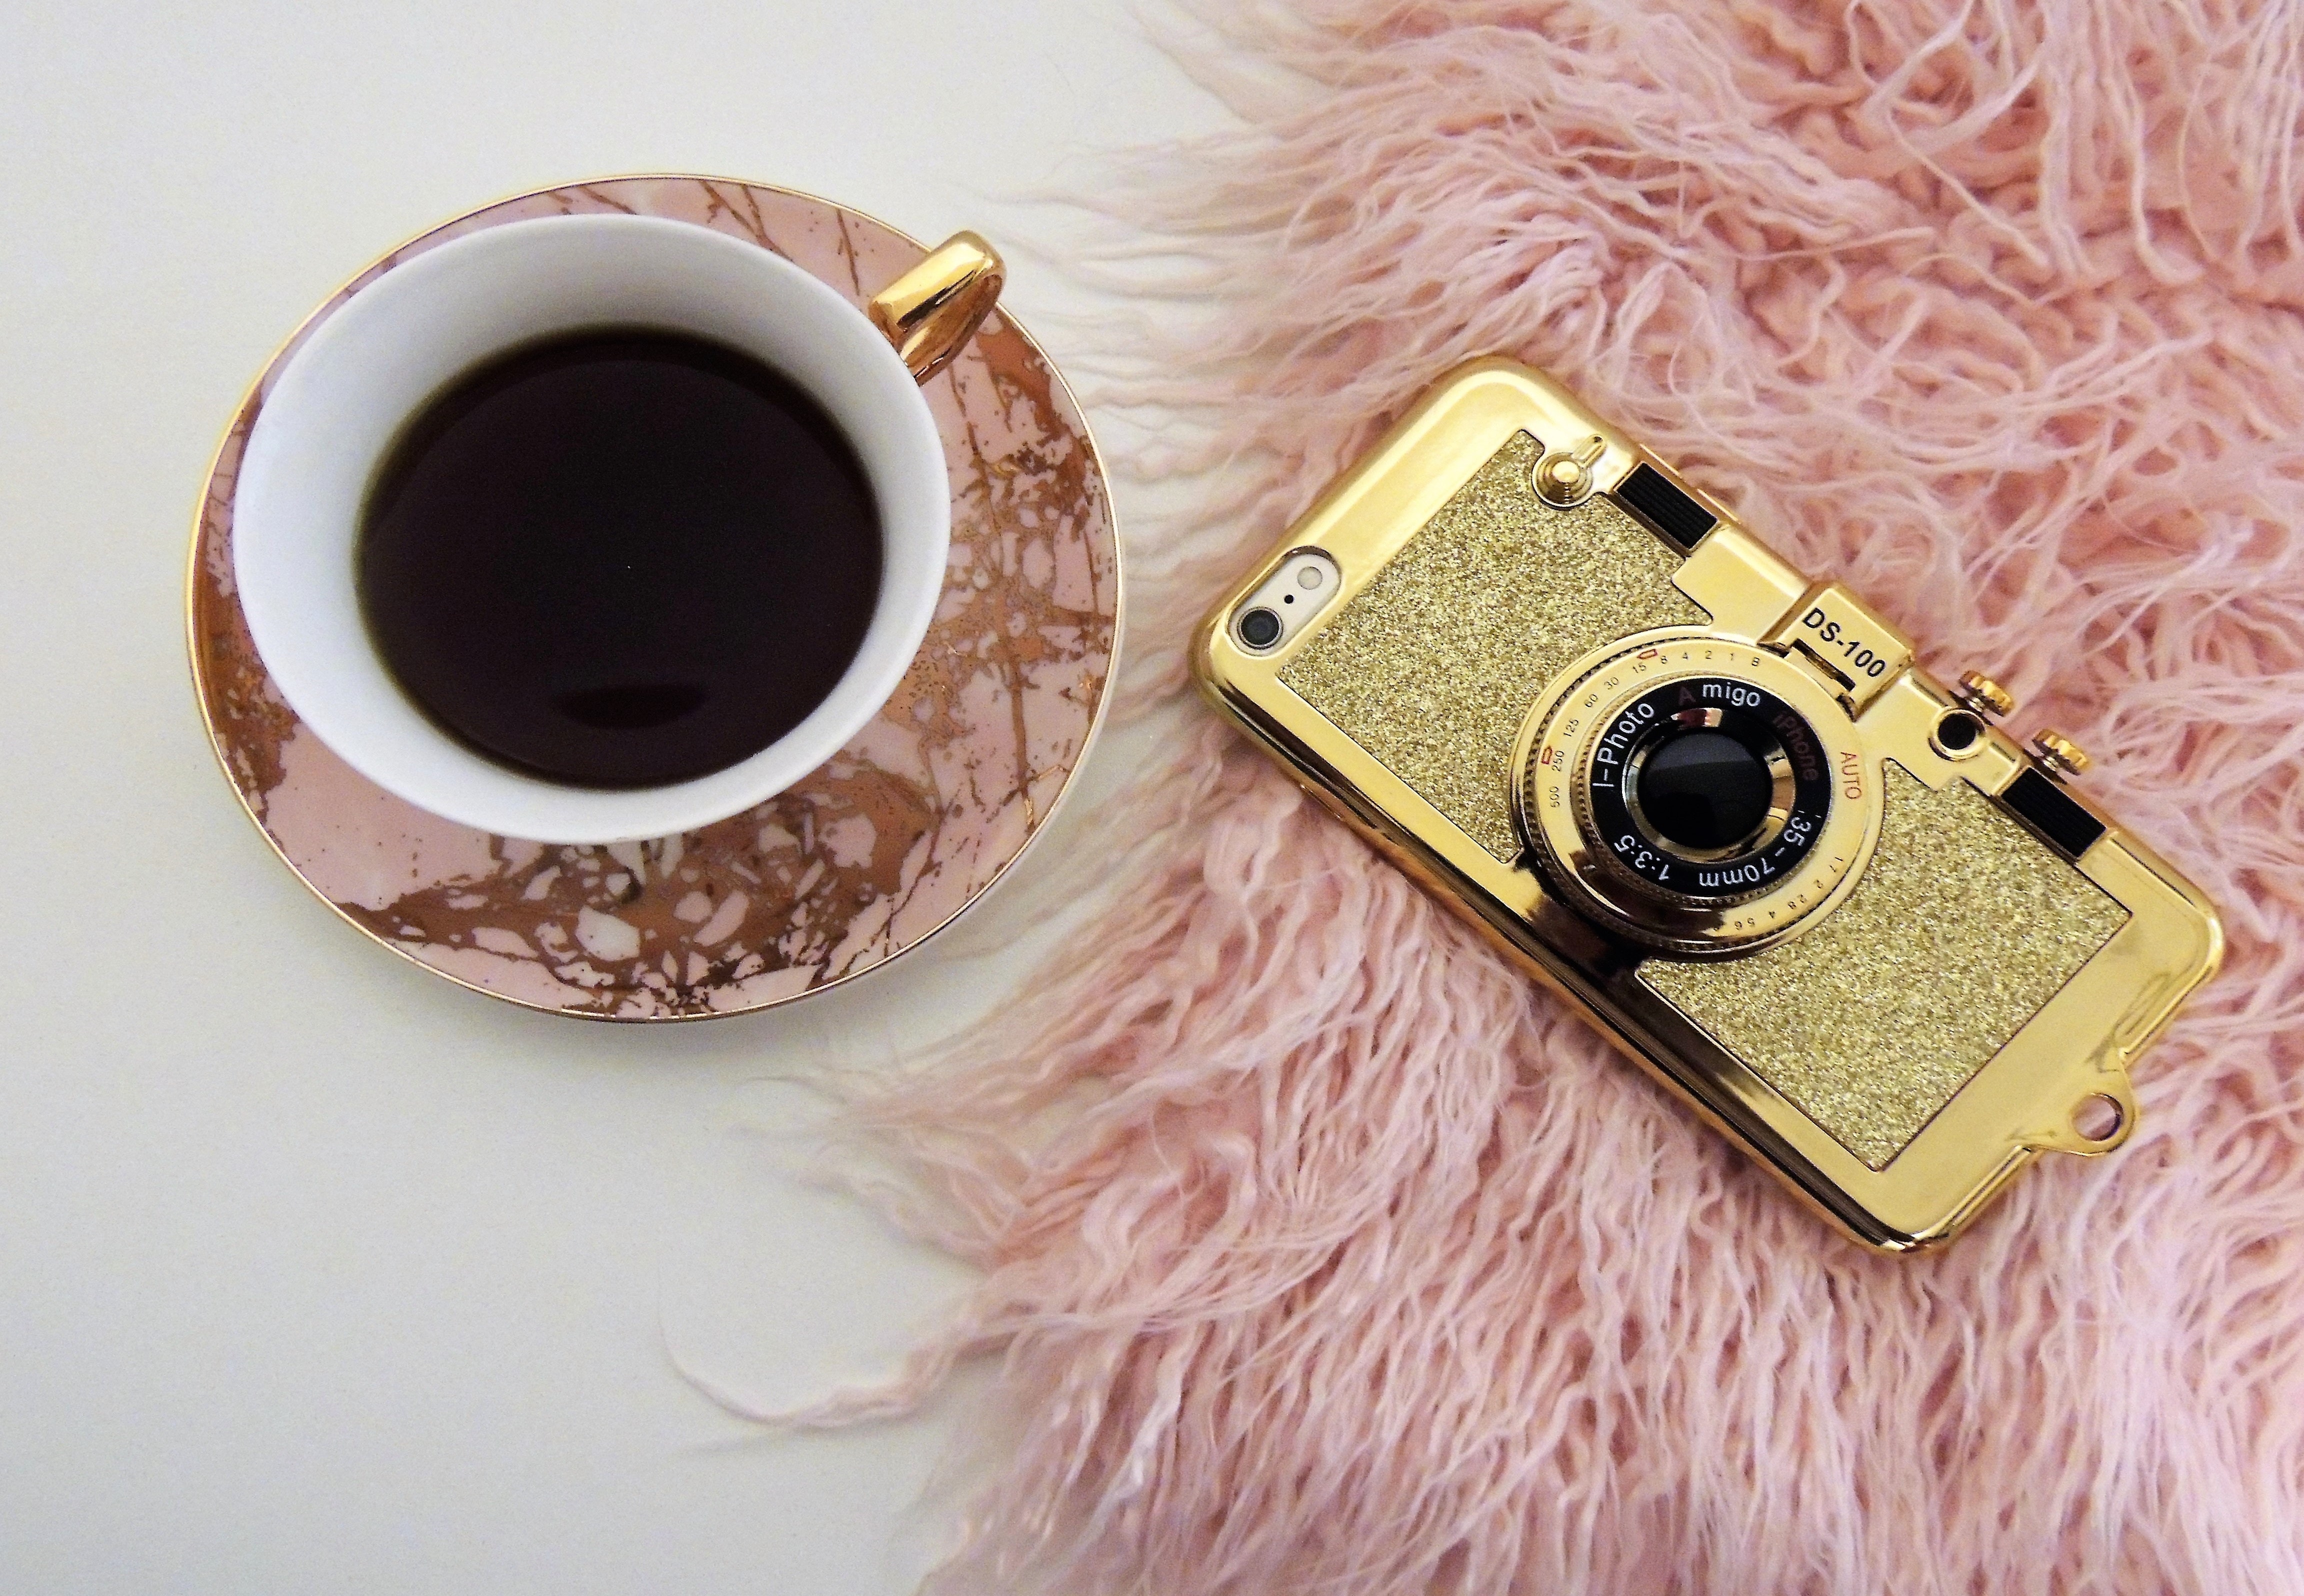

This dreamy shade of pink is everywhere from our electronics to our closets. Do my matching rose gold iPhone, Apple Watch, and MacBook make me feel a little juvenile at times? Maybe. But will I ever go back to regular old black or silver electronics? Definitely not.
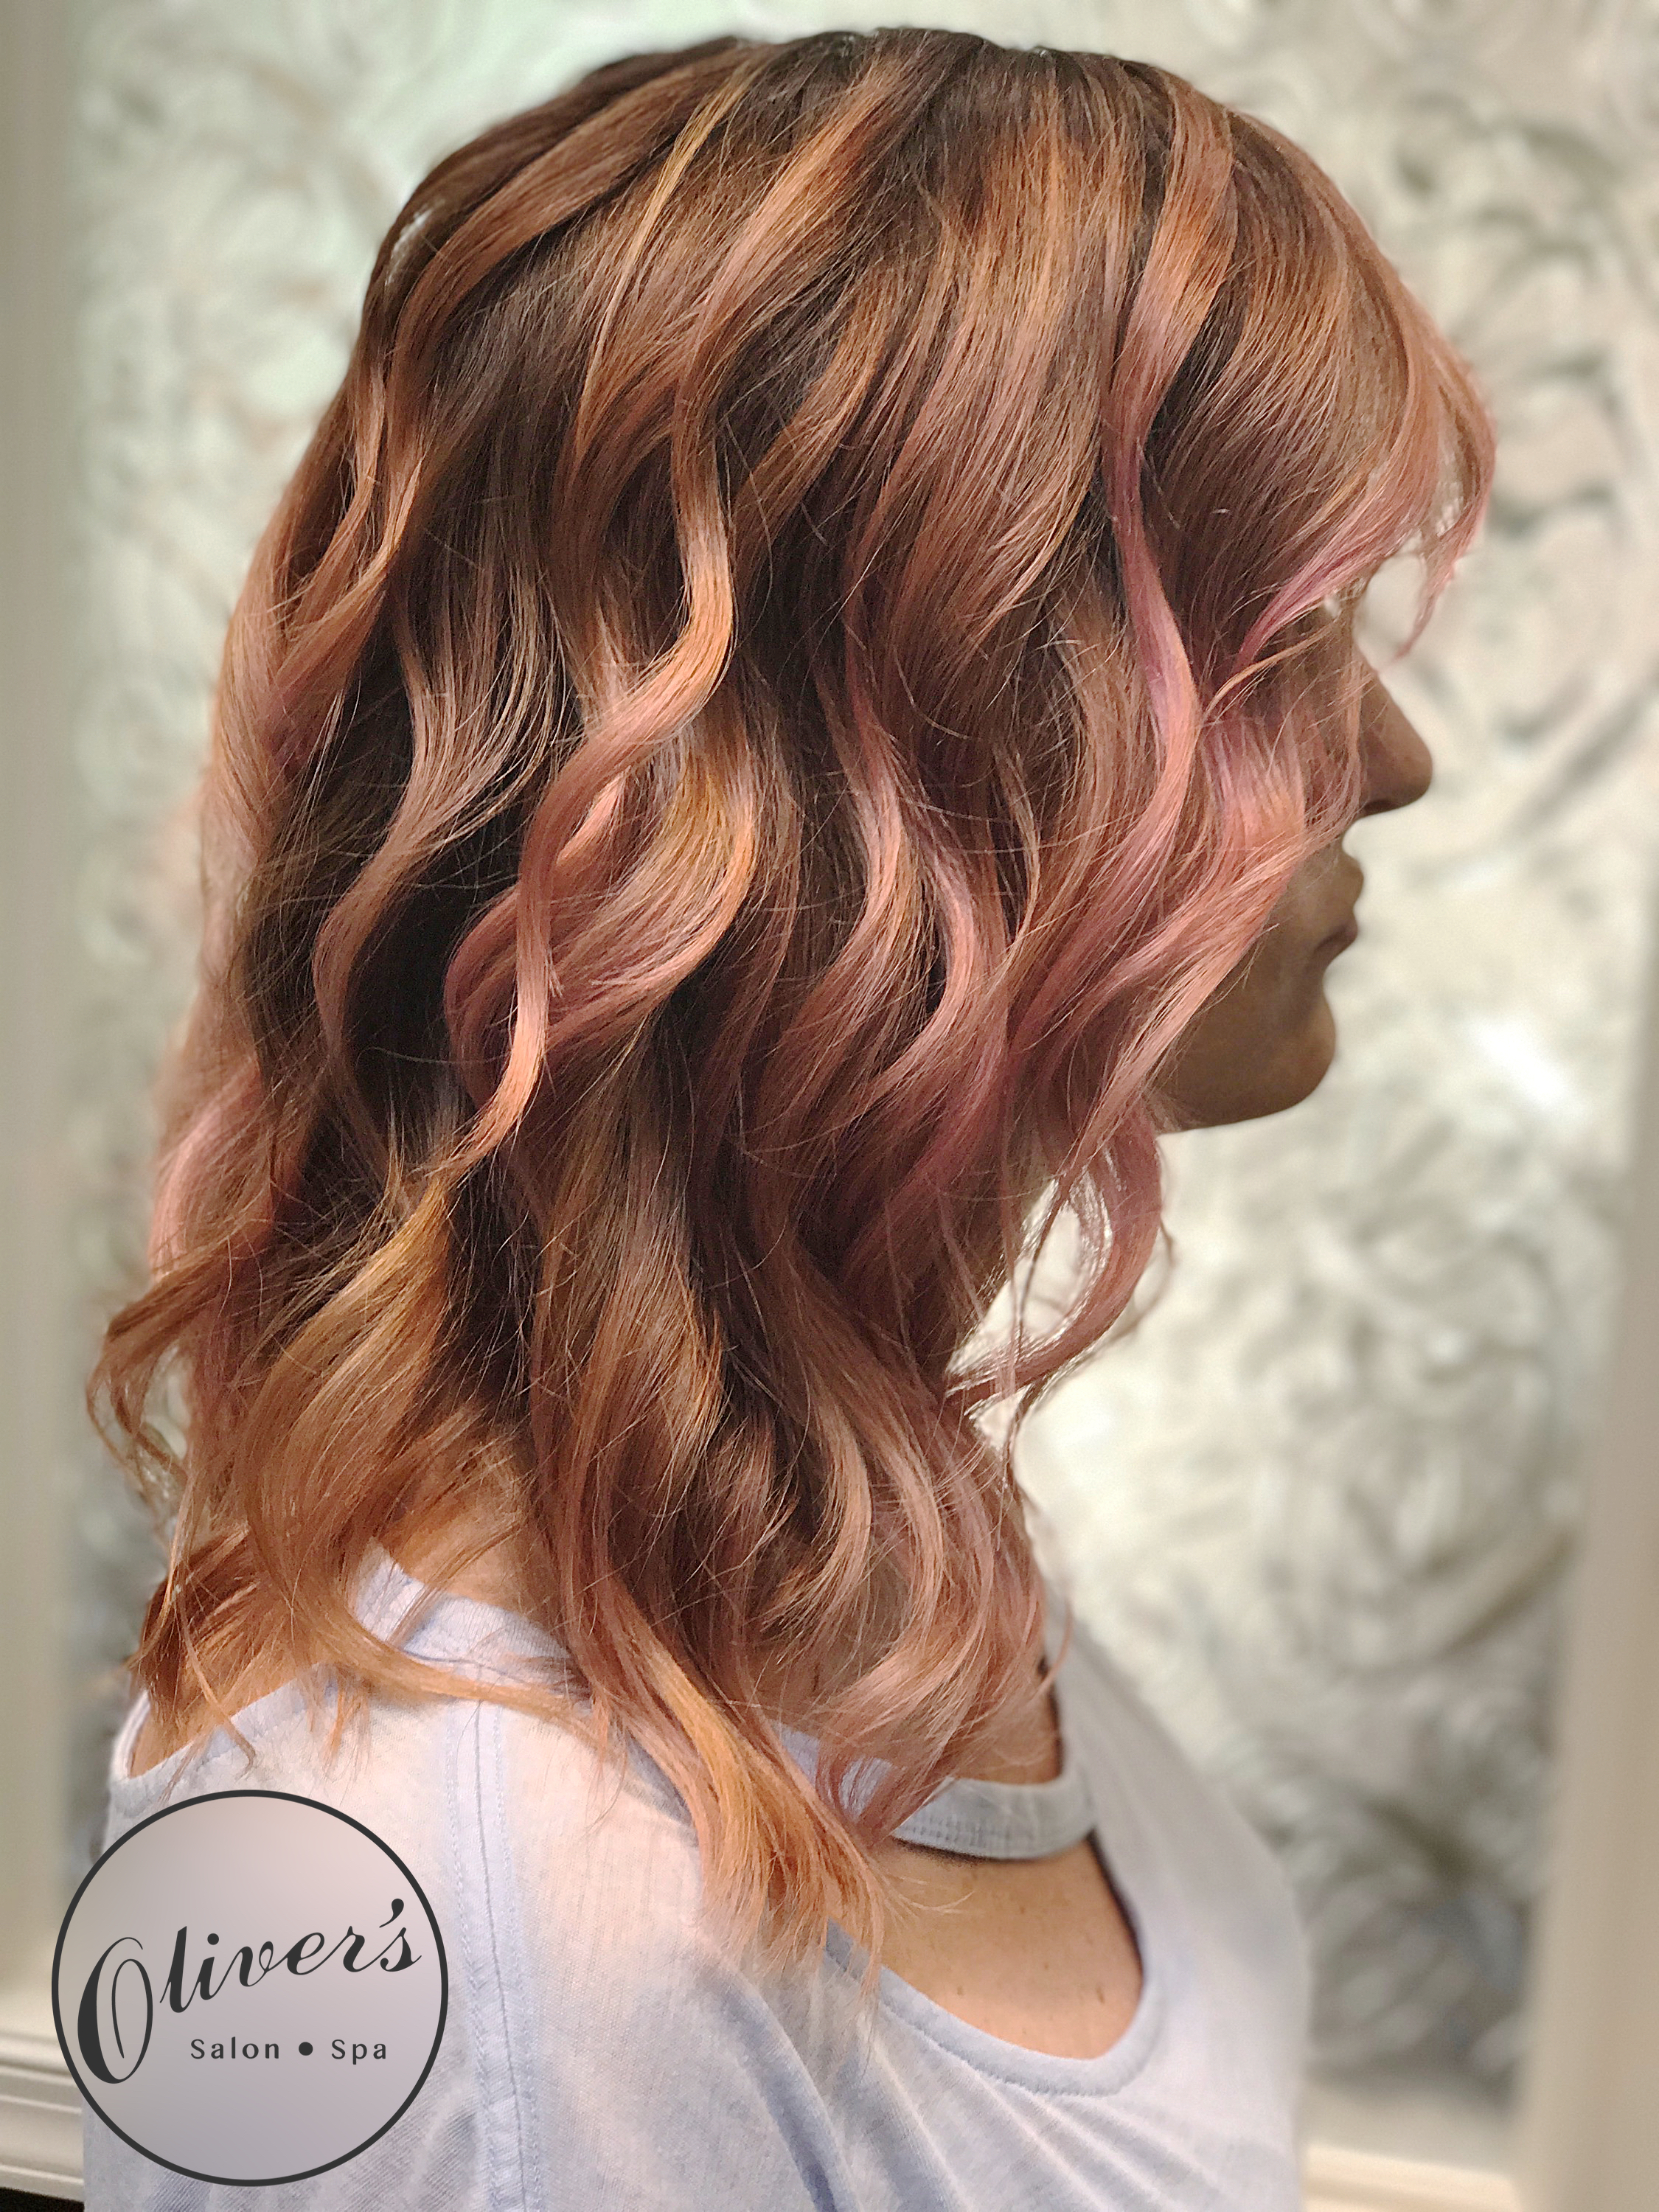
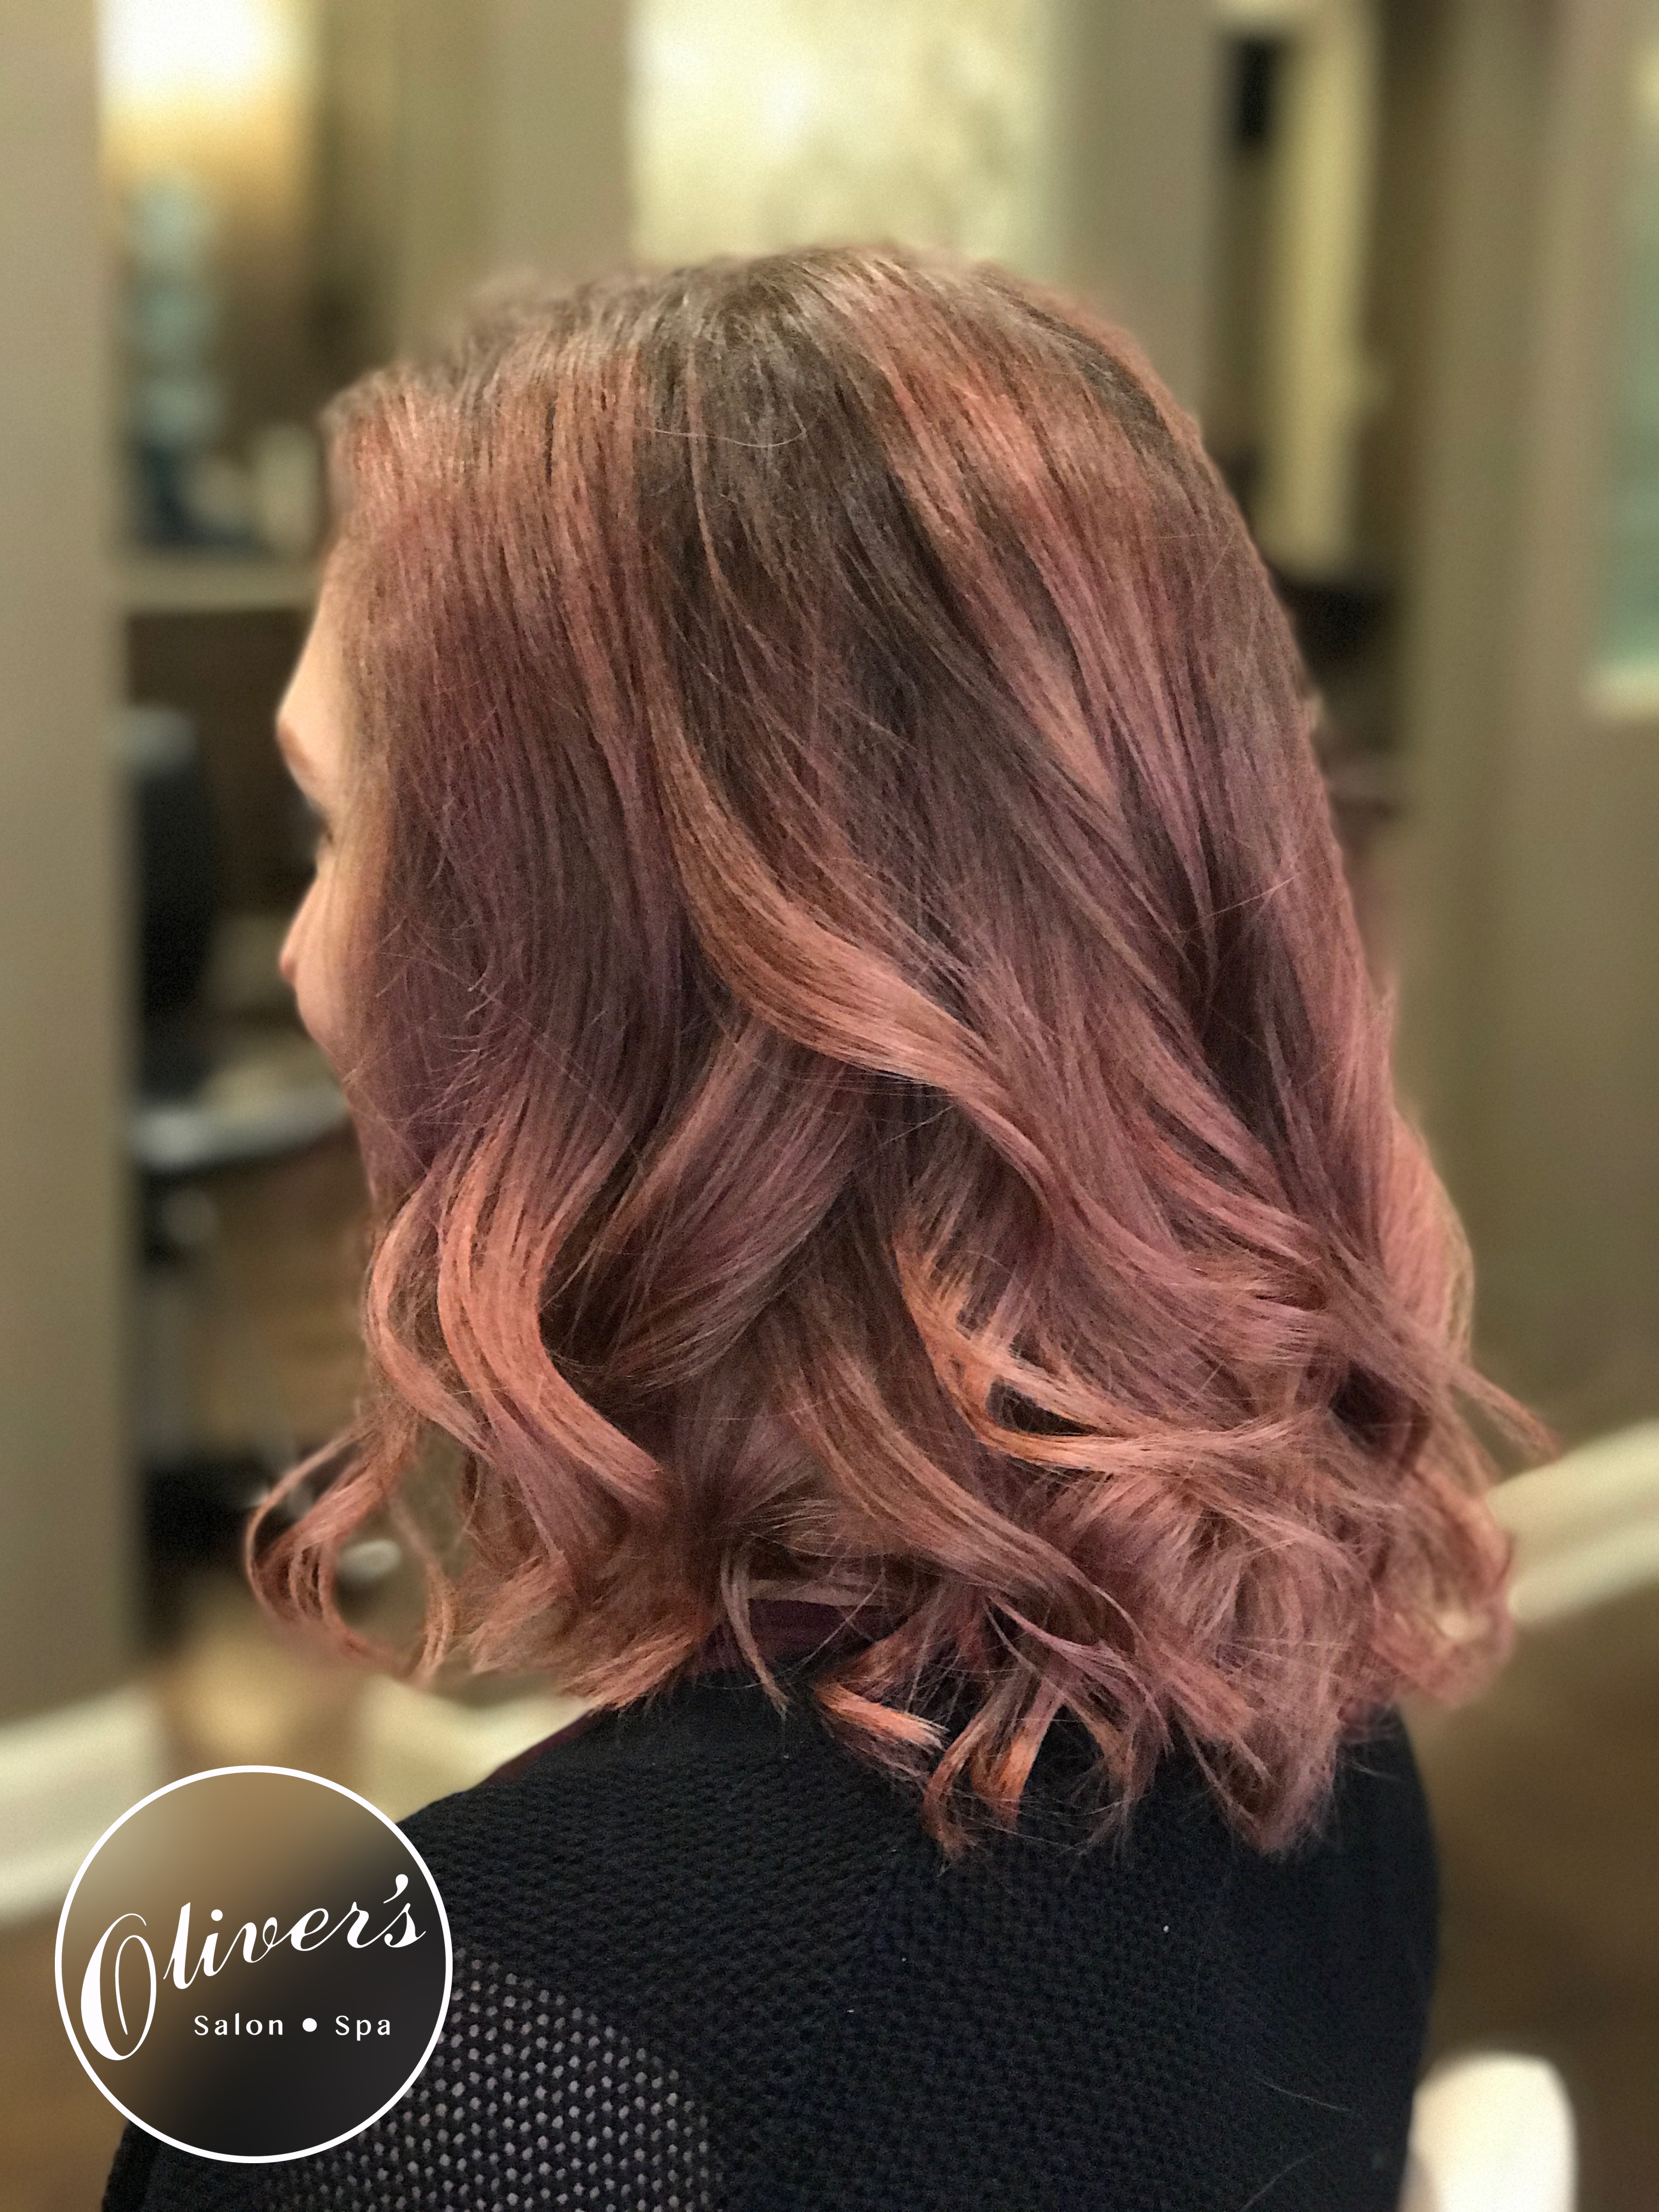
Long gone are the days of neon pink, and instead, a more muted shade is popping up everywhere. While pink hair definitely isn’t for everyone, lighter shades make it much more wearable than a typical neon “fashion” colors. Unlike neon hair, this color will still look pretty and just as wearable when it fades. These styles are trendy and fashion forward, but neutral enough so they won't clash with your outfits.
Time To Surf The Web
So even if nothing on the #hair page is catching your eye, Instagram, Pinterest, and other social media platforms are choc-full of other things to grab inspiration from. If you don’t mind a little creative brainstorming, that is. So next time a trending topic on Twitter piques your interest, or you laugh at a hashtag, maybe you can translate it into a hairstyle!
If this blog convinced you to change up your look, I recommend checking out our blog about why booking a consultation is important before you make any drastic changes.
Thank you to our stylists Luanne, Niki, and Carmen for their work! Check out the Oliver's Salon & Spa Instagram and Facebook pages for more work from our entire team. If you’re interested in scheduling an appointment, call us at (610) 366-8808 or book online.
Going Platinum (Blonde)?
It seems like lately everyone’s making the jump to platinum blonde. Celebs who used to rock sultry dark locks are now lightening up and opting for a more icy look. So how do you jump on the bandwagon? In this post, I’ll be writing about the steps you need to take to make sure your new platinum style is Hall of Fame worthy.
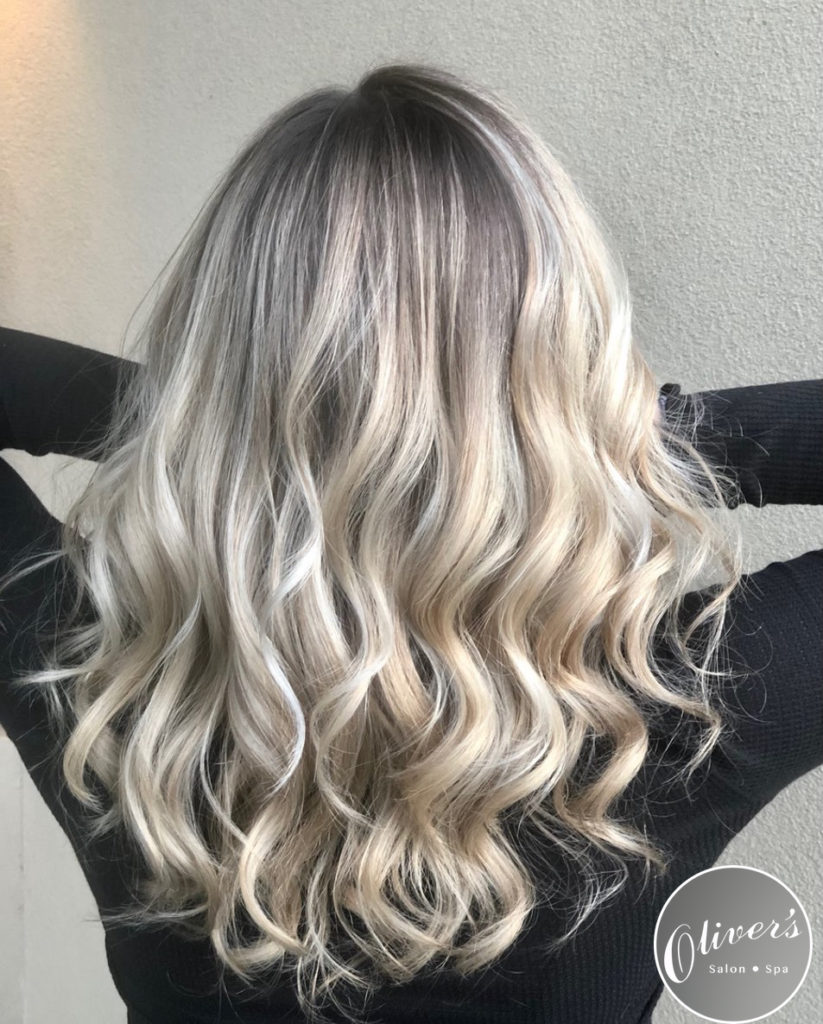
Platinum blonde AND healthy hair? Yes, it's 100% possible IF you listen to your stylist and spread your appointments out. (Style by Carmen)
So to preface, I’m definitely not going platinum anytime soon. I love writing about first hand experiences so I can give you all the real deal. Unfortunately, the Elsa from Frozen ice princess look definitely won’t suit my dark curly hair. Plus, the fairly extensive aftercare needed doesn’t fit into my VERY low maintenance hair routine. (Shoutout to the Keratin Treatment I had done that makes getting ready in the morning a total breeze). That being said, I can recognize a popular trend when I see one. And I love a good hair transformation picture. So, I’ve done some digging to make sure that you all know how to kill it with your new blonde locks. (No need to thank me.)
Step 1: Do Some Soul Searching
While I love a #transformationtuesday as much as the next person, going platinum blonde might not be for everyone. Lifting color from your hair is a process, and getting the best results won’t happen in one day. Good things come to those who wait. Going platinum and keeping your hair’s health intact is a tricky process. It potentially involves many sessions, a big aftercare commitment, and a high price tag.
Before anything, make sure to ask yourself if you’re 100% positive that you want platinum hair. I wouldn’t try to talk any of you out of a new look, but you don't want to get a couple weeks in and regret your decision. So if you have slight commitment issues, maybe platinum blonde isn’t for you. (Let’s keep in mind that although you may want to drastically change your look, you should still want healthy non-damaged hair afterward.)
If you're still down to turn your locks white-hot, I salute you. Now I’m going to assign you some hair homework.
Step 2: A Little Instagram Stalking Never Hurt Anyone
Instagram is the holy grail of hair inspiration. Even if you’re not an avid user like I am, it’s easy enough to scroll through and grab some ideas for what you’re looking for. Swipe through the #platinum or #platinumblonde hashtags to find some on-trend ideas.
Platinum blonde isn’t a one size fits all label. There are different tones, add ons like balayage or highlights, and other factors that might change the final outcome of what you’re looking for.
It’s also smart to take your features and complexion into account when choosing a final look. Collect as many ideas in like with the look your going for to have on hand for your stylist. If you have picture references to show your stylist it’ll make your consultation more productive and your final color customized exactly how you want it.
Step 3: Consultation
First off, if you’re unfamiliar with what a consultation is all about, check out my blog about them here! Now is the time when you get to run the ideas you’ve collected by your stylist, and devise your plan for swiping your platinum card. Don’t feel defeated if your stylist tells you it’s going to take more appointments than you were expecting. They have your best interest at heart and don’t want you to end up with any damage from lifting your color too quickly. If your stylist is truly your BFF, they won’t let you destroy your hair by taking out all of your color in one shot.
During this initial visit, your stylist is going to check out the integrity of your hair. All of us have different hair health, so depending on where your hair is at strength wise it may affect your platinum blonde journey. If your hair is more on the damaged side, slow and steady will win the race. If your hair is a little stronger you may be able to get away with fewer treatments. HOWEVER, and I can’t stress enough, this entire process most likely will not be done at once.
Side note: Make sure you take a before picture! There’s nothing better than a drastic transformation swipe post on Insta.
Step 4: Sessions
This step is going to vary for everyone depending on your starting color, but if there’s one point I want to drill home it’s this: You aren’t going to have platinum blonde hair in one go. You will have to visit your salon for multiple lightening sessions that will vary depending on how dark your original color is and your hair’s current health. Each session will act as a stepping stone to gradually lift the color out of your hair. So while your hair is “in progress,” the color of it will vary. I can definitely understand why the uncertainty of leaving your salon with a unknown color is off putting. Just keep in mind that your stylist won’t let you leave the salon looking unpresentable. Your hair is on your head but it also has their name on it. Sending you out the door looking like a brassy mess doesn't benefit either of you.
As I mentioned before, this step does have some variables to it. Multiple lightening sessions will gradually lift color depending on how dark your hair is. Because your stylist wants your hair to look AND feel amazing they’re likely to suggest bond builders like Olaplex or B3. These products prevent some of the damage your hair might incur. They act as an insurance policy for your hair while it goes through multiple lightening sessions that have the potential to be damaging. Your stylist can mix these directly into the lightener (bleach) so they won’t add any time to each individual appointments.
Step 5: Take Notes, The Rest Is In Your Hands
One downside to platinum blonde hair is the extra at-home maintenance routine you’ll have to get used to. A purple shampoo needs to be incorporated into your routine to ensure that your hair stays platinum and doesn’t get yellow or brassy. Follow up appointments will also be necessary to address any grown out roots or fading. So, ask your stylist how often you should be coming in for a touch up. Make sure follow your stylist's directions to a T to get the longest life out of your platinum hair.
Step 6: Welcome To The Platinum blonde Club
Congratulations! It was a long, hard road but I’m sure it was worth it. So now, here’s where that before picture comes in handy. Shock all of your friends with that amazing before and after pic of how you went from whatever starting color to a total platinum princess. After all, what’s a new hairstyle without the Instagram cred that goes with it?
[one_half] [/one_half][one_half_last]
 [/one_half_last]
Two more platinum blonde beauties by Carmen, and not a split end in sight. With one of our fab stylists and a little patience your hair can look this great, too.
Thank you to our stylist Carmen for giving me the 411 on the steps to going platinum and for the photos of her awesome work. Check out her Instagram page @color_bycarmen for all of her amazing work.
For more information on how to get this service from one of our many talented stylists, call us at (610) 366-8808 or book online.
The Keratin Smoothing Treatment
Now that summer is just about over, it’s time to reflect a little bit. Everyone has been loving the Keratin Smoothing Treatment that Oliver’s offers which is great! I’m glad I got to showcase such a cool treatment that a lot of people don’t know about, especially during the summer when a ton of us suffer from frizzy and difficult-to-manage hair. In this post, I’m going to provide a quick follow up to the Keratin Smoothing Treatment I was able to receive. If you haven’t gotten the chance to read that blog, check it out here first, then come back to read about the results!
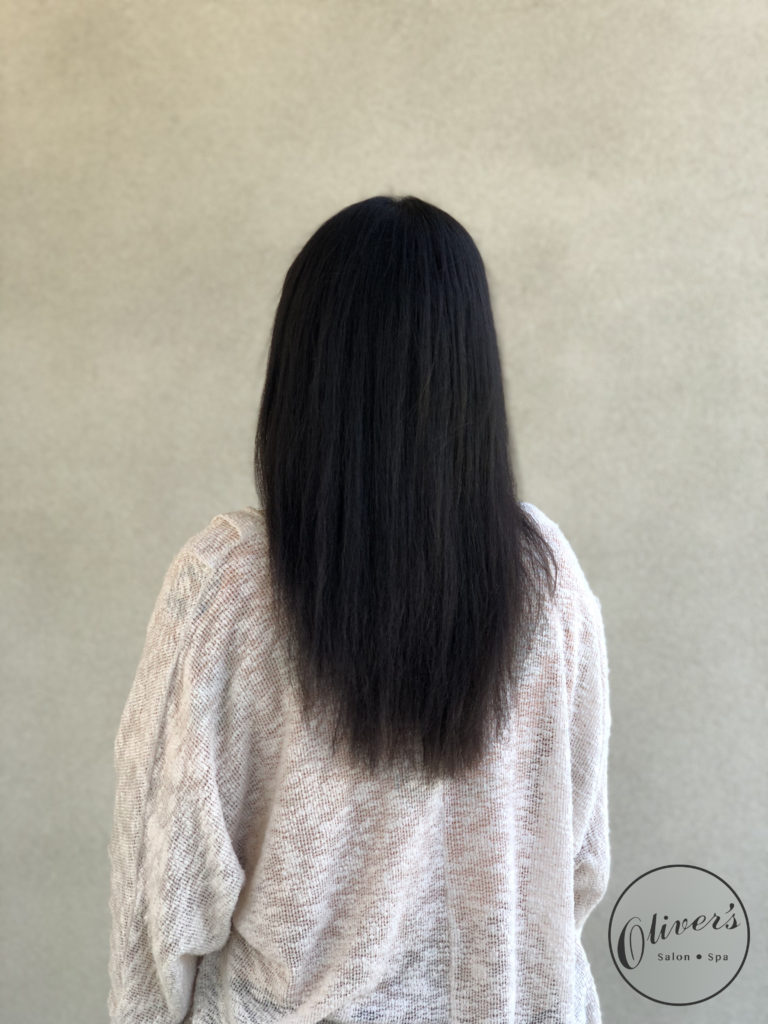
Here’s my hair 6 weeks out from the treatment! It’s still straight and way softer than before I had the treatment done. For the full follow-up, keep reading.
So first, a little recap of the results I saw immediately after my treatment. The treatment I received was the Keratin Express Blowout, which is the shorter version of the full Keratin Smoothing Treatment. It was expected to last about 6 weeks and make my hair less reactive to humidity and frizziness. The few days directly following my hair was much easier to manage, especially on humid days when it’s usually a nightmare. I don’t fully straighten or style my hair on a daily basis. I generally touch up my roots and ends with a straightener in the morning, but now I wake up, brush it out, and go--yes, I woke up like this.
Day to Day Differences
I didn’t really notice a decrease in the quality of the treatment as the weeks went on. My hair didn’t seem to get any less smooth and I wasn’t noticing it reverting back to its original frizz, even in humid temperatures or during rainy days. Obviously, when I wash my hair it still comes out curly, but my curls are significantly looser and easier to run my fingers through. I’ve been doing a lot of travelling so not having to bring as many styling products around with me has been a huge plus.
Washing
One thing I was super excited to see was how the treatment affected my natural hair. I have curly hair that I usually wear straightened, and from washing to styling, it used to take me around 90 minutes. My hair is definitely much harder to wrangle when its curly and nearly impossible to comb through while it’s wet, especially before I condition it.
Following my Keratin Smoothing Treatment, washing my hair was a hundred times easier. While it was wet, products easily coated my locks and I was able to spend less time fighting with the comb. My curls were looser so sectioning everything off before blow drying was much easier. However, the biggest difference this treatment made was after I blow dried it. Usually, blow drying my hair takes about 20 minutes, and I end up looking like I just got electrocuted. The Keratin Smoothing Treatment made my hair so much tamer after blow drying for less than 10 minutes. I’d say my blow dried hair was about a quarter of the size it usually is, and looked much more presentable to the point where I could have walked out of my house without straightening it.
It’s also worth noting that I don’t wash my hair everyday, so this probably prolonged the treatment's effect.
Final Thoughts
I would definitely recommend this treatment to anyone who has more difficult to manage hair, especially if you have curly or wavy hair. It will loosen your curls and make them easier to deal with, without any damage. Even if you have straight hair that picks up humidity, this treatment would still be perfect for you. It didn’t take any body or fullness away from my hair, it just make it easier to manage while curly and more sleek and controlled looking while straight.
[one_half]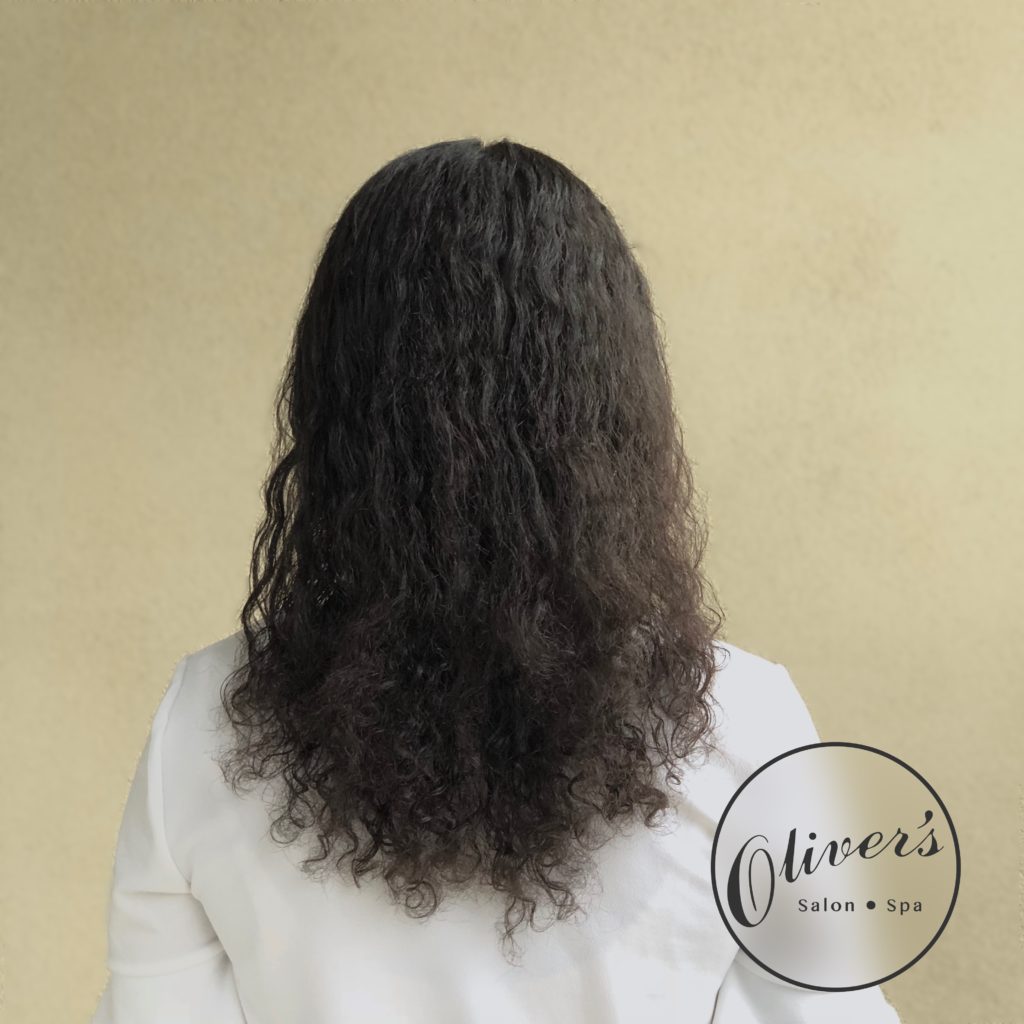 [/one_half] [one_half_last]
 [/one_half_last]

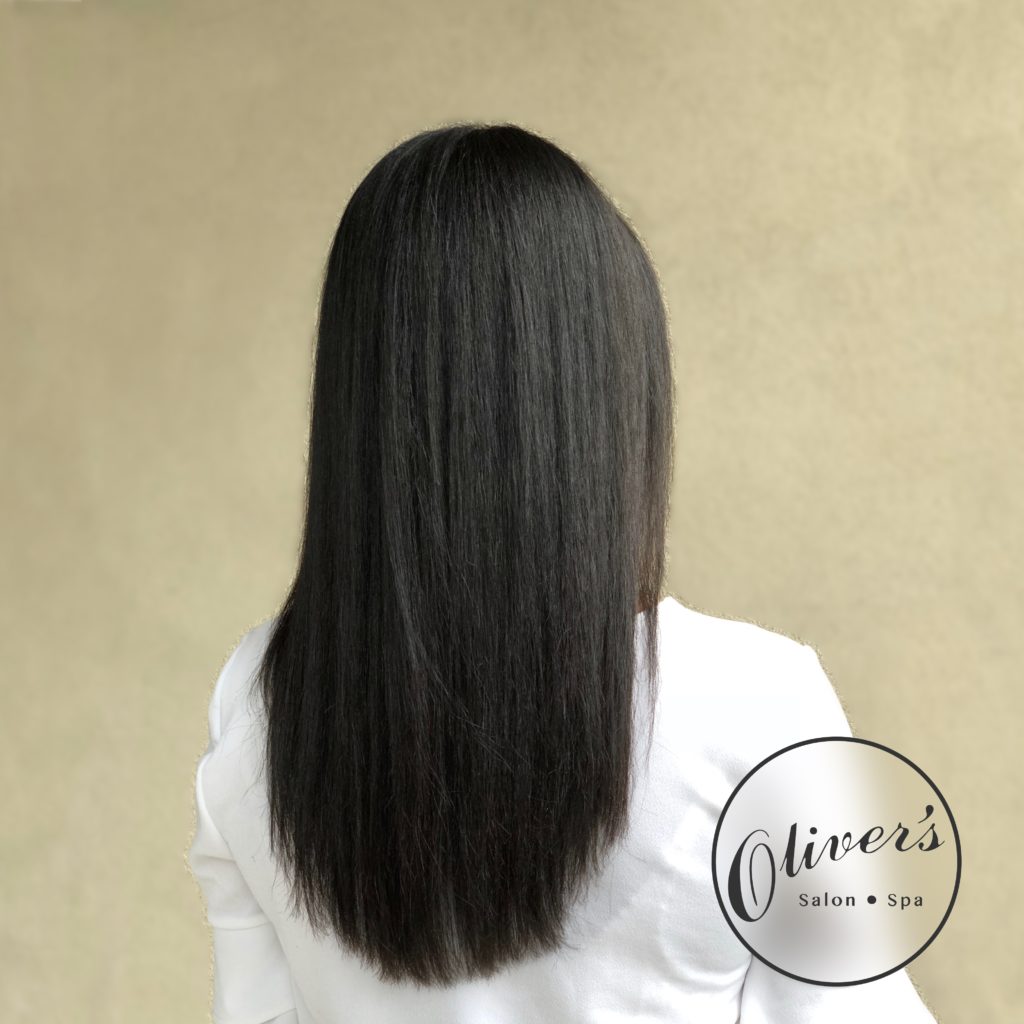
Here’s the full set of before and after pictures, from day one to 6 weeks later! The first two photos are from the day I got the treatment, and the third is after 6 weeks. I’m super happy with the results I got from the Keratin Express Treatment and I'm still getting benefits from it even 6 weeks later.
One big plus I noticed was my lack of split ends. I had my hair trimmed the same day as my Keratin Smoothing Treatment, giving my ends a fresh start. I usually straighten the ends of my hair daily, so I notice damaged ends much sooner following a trim. However, since I've been completely skipping that step in my routine, my split ends have been nonexistent.
If you’re still unsure about the treatment, start out with the express version like I did. It’ll give you an idea of what your hair texture will be without committing to the full Keratin Smoothing Treatment.
Time Saved
In the morning, before the treatment I’d estimate that I spent about 15 minutes doing my hair. Now when I get ready, I literally brush it and leave, which takes under a minute. So across about 6 weeks, that equals over 10 hours of saved time in the mornings across about 6 weeks. (This is only a rough estimate. I’m on summer break so please don’t ask me to do any serious mathematical computations for at least another week or two.) This is a huge amount of time, and doesn’t even account for the time I’ve saved on hair-washing days. Since the treatment, I’ve been setting my alarms later because I know I don’t have to do my hair. This is totally ideal for someone like me who is always looking for that extra couple of minutes in my bed in the morning.
So just for fun...
Here are a couple ways I could have spent those 10 hours:
- Watching 20 episodes of The Office.
- Run about 78 miles at the gym. (Who am I kidding, this one would never have happened)
- One beach day.
- A one-way flight to Italy.
- 10 extra hours at work. (Maybe I’d feel less guilty about my most recent shoe purchase if I had done this one)
What did I actually do? Catch a couple extra minutes of sleep in the morning. #NoRegrets.
Interested in saving time in the morning (and hopefully spending it more productively than I did?) For more information on how to get the Keratin Express or the full Keratin Smoothing Treatment from one of our many certified stylists, call us at (610) 366-8808 or book online.
Salon Consultations 101
With so many different hair styles and trends out there, it’s hard to avoid hair envy. Try scrolling through the Instagram #hair page without being just a little bit jealous of that girl with the super cute rose gold ombre, or the one with the icy blonde balayage. Everyone gets that itch every once in a while to completely redo their look. So what happens when you decide to scratch it? You take the plunge and call your stylist saying you need a change. Sure, you may have an Instagram picture to go off of. But how do you make sure that your new look comes out looking just how you want it? A consultation.
In this post, I’m going to give you some insight into why booking a salon consultation with your stylist before making any major changes is an absolute must. A quick consultation with your stylist will put you both on the same page, address any possible issues that may arise, and can potentially give you new ideas that you hadn't thought about before.
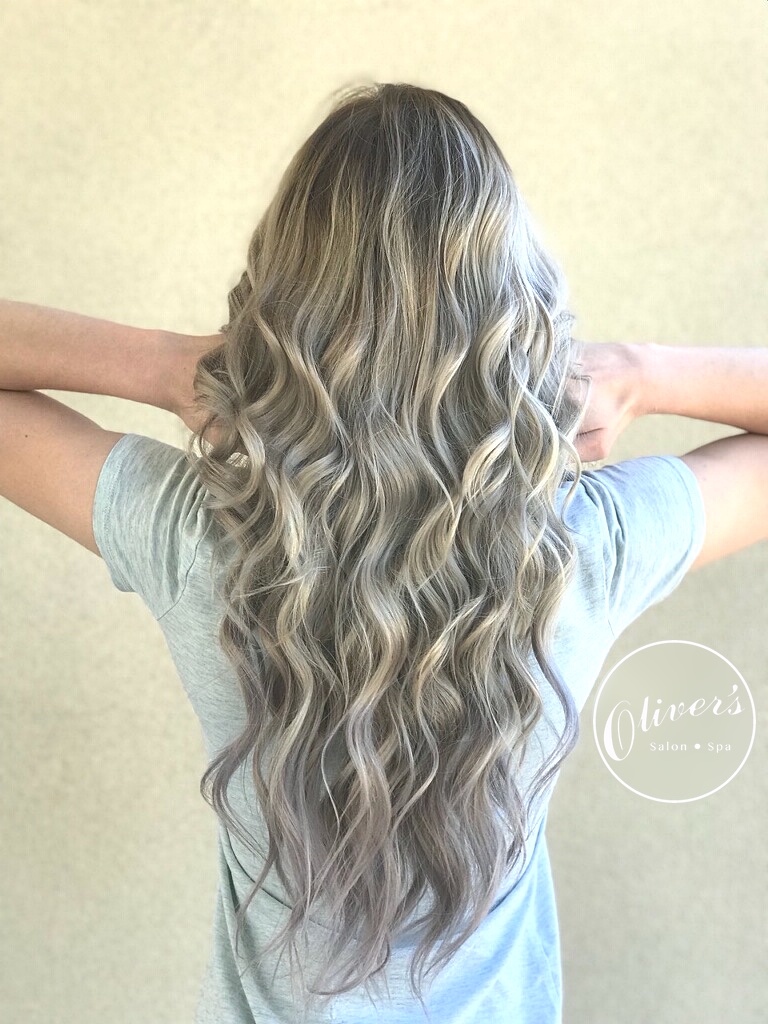
Making a radical change? This process took a salon consultation, as well as multiple visits, lightening sessions, and sets of extensions. Make sure to schedule a salon consultation with your stylist so they can pull off every component of your perfect new ‘do. Keep reading to see pictures of the entire process!
Let’s face it: Sometimes, despite our best efforts, we’ve all made style or beauty mistakes that are downright embarrassing. Whether it was my barely-there eyebrow phase, or my neon hair phase, I’ve deleted more Facebook and Instagram pictures from middle and high school than I can count. It happens to all of us, because it’s easy to overlook a glaring error in your beauty routine or pick a style that might not fit into your life well.
For example, I love all the amazing balayages that are popular right now. But I stay away from getting one because I know I'm not the best with maintenance. (My hair has been super easy to style since having a Keratin Express Treatment. Click here to read my blog about it!) The most perfect style in the world isn't really perfect if it also doesn't fit into your routine and habits. That’s where your stylist can step in. Along with knowing the technicalities of HOW to do your hair, stylists are also able to make suggestions that will customize the style you want perfectly into to your life.
So What Is A Salon Consultation?
A salon consultation is a quick visit with your stylist or aesthetician to go over what you want and need in your next visit. They’re not necessary every time you get your hair done. If you’re a regular and have been getting your haircut by the same stylist in the same way for 10 years, naturally you don’t need any advice on what you want to get done. However, if you’re seeing a new stylist, visiting a new salon, or making a change to your current hairstyle it should be your first step.
Why Is A Consultation Necessary?
1. Lifestyle
It’s great to go in with an idea of what you’re looking for, but it’s also smart to let your stylist make suggestions. Our stylists won't sway you away from what you want, but they can ask questions you may not have considered. Does your job require you to wear your hair up? Are you able to take a lot or a little time for styling in the mornings? Are there certain products that you absolutely can't live without? These are all factors that go into choosing your perfect style that works for your life. The more custom tailored they’re able to make your appointment, the more likely you are to love your new hairstyle afterward.
2. Time
Everyone's hair type is different. Differences in hair length, thickness, type, and curl patterns can change your appointment drastically. Consultations can help the stylist get a gist of your appointment, ensuring they have enough time to do what you've requested. Getting to see you and your hair in person beforehand is a major plus. Your stylist wants to give you the optimal amount of time to make sure you're feeling well taken care of and not rushed out of their chair.
3. Reflect On Your Last Appointment
Didn’t like your bangs the last time? Felt your hair color made you look a little bit washed out? Now is the time to tell your stylist of any concerns you had from your previous appointment. So, be honest. Communication is key if you want to make sure you hair comes out exactly as you want it.
4. Different terms/lingo
Sometimes it’s hard to describe exactly what you want. I love beauty and style, but even I’m not a walking hair lingo dictionary. If you scroll through any stylist’s Instagram, they’re likely using more hashtags than you can count. From balayages to mermaid hair to platinum pixie cuts, there’s such a huge range of hairstyles and terms that describing exactly what you want can get messy. A consultation, especially one with pictures and references, is way more helpful to a stylist than just booking and booking an appointment and just saying you want “highlights,” when you actually want a “balayage.”
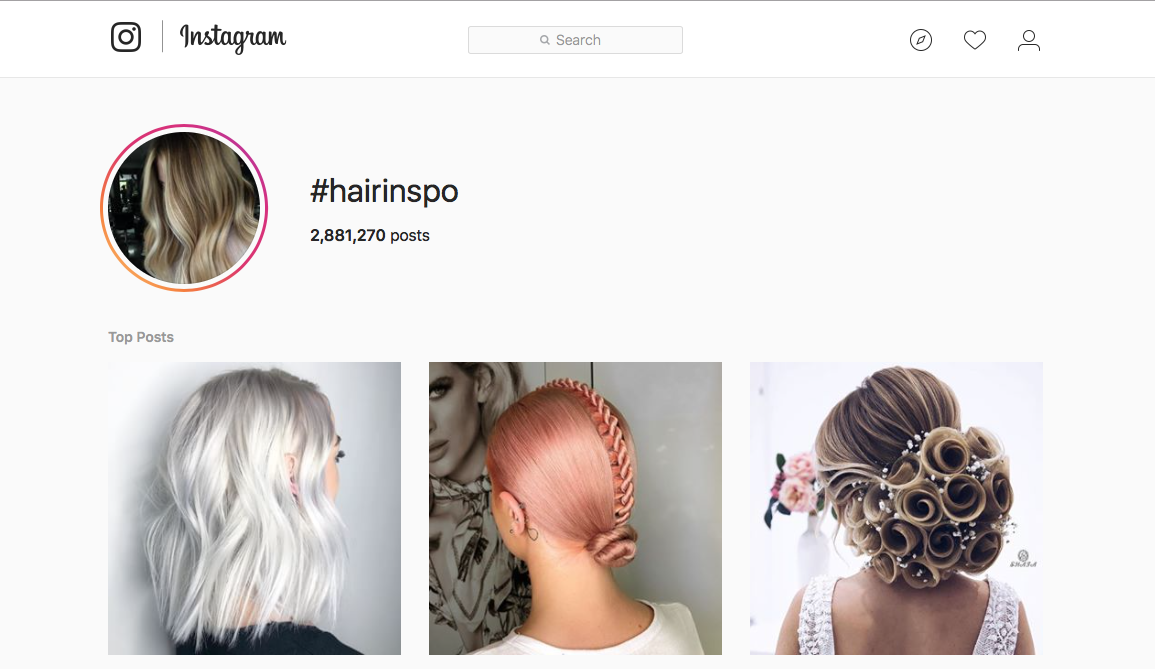
Nearly 3 million posts on this hashtag alone makes pinning down what you want in a look to one specific photo is almost impossible. Find multiple to show your stylist during your consultation and they'll figure out the rest.
There are so many different features of hairstyles to consider, such as tone, shade, and cut. So, its a great idea to have multiple picture examples highlighting different things you want. Having multiple pictures where you can point to different features is ideal. Think: "I like the bangs on this one. I want the length on this one but with more layers. The color on this picture is perfect.”
This method is so much more personalized to what you want than a single picture. Now, your stylist can piece together your perfectly customized look.
5. Feedback On Ideas
Stylists know what is and isn’t recommended with certain hair types and best ways to frame your face. So, they have valuable background knowledge that can help you make your final decisions. They'll be able to tell you any effects a service may have on your hair type. For me, this is a huge plus because my curly hair is prone to dryness. So knowing beforehand that a treatment will dry it out even more may change my decision. This is also helpful for maintenance like I mentioned before. If you show your stylist a picture and the maintenance requirements are something out of your comfort zone, you may want to opt for an easier style.
6. Specialty Appointments
Some hair appointments take even longer. For example, if you have very thick or curly hair, or damaged and brittle hair. A stylist will cut short, fine hair differently than they'll cut long curly hair. If this is you, you share my stress of going into a stylist. Do I want a different look? Yes. Do I want to destroy my hair in the process? Definitely not. A consultation is a perfect way to address any concerns or have your questions answered before your appointment.
The same goes if you're looking to get hair extensions. A consultation is required to color match your hair perfectly and pick out the desired length. Then, your extensions are custom ordered just for you. Customization is key to finding your perfect new look. So, consultations are necessary because your specific hair extensions need to be ordered in advance of your installation appointment.
Need Proof? Check Out The Dramatic Change In The Photos Below. This Transformation Was Only Achievable After A Successful Consultation
These pictures are the before and after extensions were added. These extensions were custom ordered and dyed for the client to make sure they perfectly matched her new color. Starting from the first picture to the last, it's hard to tell that's even the same person. For a change this drastic, a consultation was needed to talk through all of the steps that would take place.
Scheduling One Appointment Is A Pain, Now I Have To Schedule Two?
At Oliver's we want to give you the highest quality experience every time, so we make sure to offer consultations to all of our clients free of charge. They only take about 15 minutes and can give both you and your stylist peace of mind. After a quick meeting, you'll both know exactly what you want on the day of your appointment. Plus, you’ve done your due diligence with your stylist. Good hair karma all around.
If you can't pull off a consultation, another option is an "online" consultation. (I understand having a busy schedule, no judgement.) First, snap a couple selfies of your hair that show its different features (length, thickness, color). Make sure these are in the best lighting possible so they're accurate. Next, gather all of the #hairgoals pictures you've compiled of what you want your end look to be. Like I mentioned before, the best method is to have multiple pictures that you can pull inspiration from. Then, pass both of these onto your stylist so they can figure out what it'll take to pull off your before and after. While an in-person consultation is still preferable, this is a great alternative to simply booking an appointment without giving your stylist an idea of what your hair's starting point is.
Other Areas For Consultations
Changing up your hairstyle isn’t the only type of appointment that might need a consultation. If you’re receiving any type of permanent makeup application, Oliver’s requires a consultation. These procedures are partially permanent and require some thought before committing to. Microblading, for example, potentially lasts for years and can completely change your eyebrow shape and the entire look of your face.
A full blown consultation separate from your appointment isn’t necessary for most services. However, it’s always a good idea to let your aestheticians or masseuses know of any potential issues before an appointment. That sore shoulder you neglected to tell your masseuse about has the potential to make your massage seriously unpleasant. So, just give them a heads up on any areas that may need special attention. Same goes with any skin issues (like eczema or psoriasis) of you’re receiving a skin treatment. Spa treatments are for relaxation, so make sure you let your professional know of anything that might prevent that.
We Want You To Love Your Look
At the end of the day, we want our clients to have great relationships with our service providers. The better your stylist or aesthetician knows you, the better the end product is. Salon consultations are a great way to not only make sure you’re getting exactly what you want from a service, but also to form a bond with your stylist or aesthetician so in the future so they know your tastes and can give you suggestions. Oliver’s has many of clients that have been coming in for years that know exactly what they want. If you’re a new client or trying out something different, book a consultation to get that Instagram-worthy hairstyle.
If you want to change up your look and are interested in having one of our stylists help you out, schedule an appointment by calling us at (610) 366-8808 or booking online.
The Secret To Better Skin
If you’re anything like me, summer isn't exactly friendly to your skin. We all love the bronze-y summer glowing skin that the warmer months give us, but I’m not exactly a fan of the dryness that follows it. Vacations, outdoor activities, and sunbathing are all some great perks of summer, but they can be a huge opportunity for the sun to damage your skin. If you want to enjoy the sun, repair your skin, and pamper yourself a little bit all at the same time, skincare services like facials can be a great way to counteract that damage and put your face back on the right track. (So maybe you can have your metaphorical cake and eat it, too.)
For this post, I received the Oliver’s facial and see how skin treatments would fit into my skin care routine. So if you're constantly asking, "How do I get better skin?", the answer might be to pamper yourself a little more often.
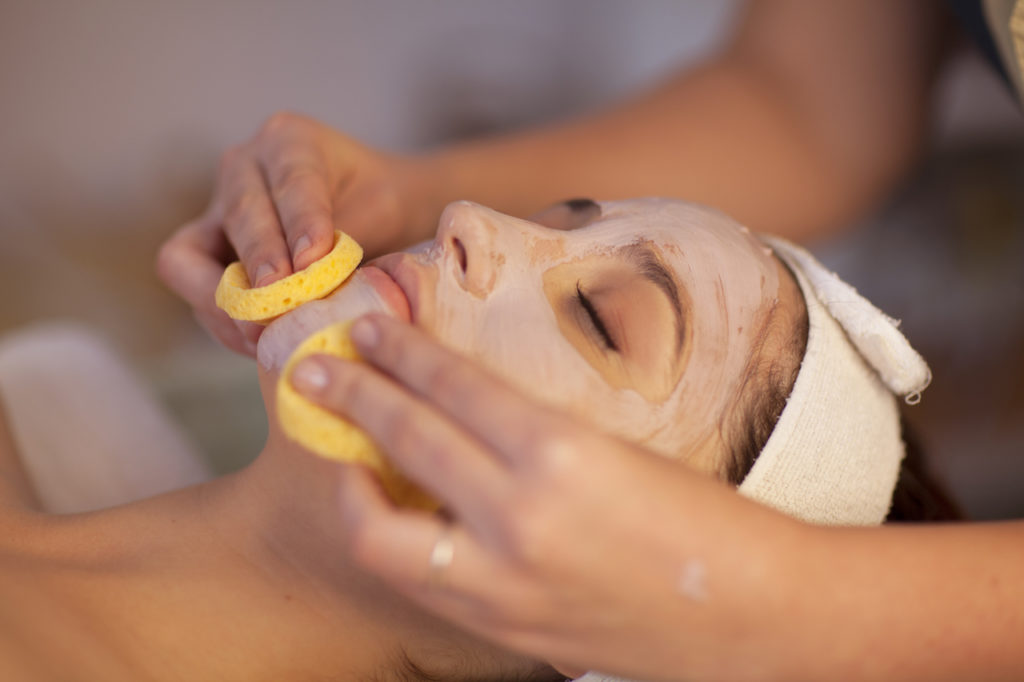
Facials are the ultimate tool to relaxing yourself and giving your skin that much-needed boost during the summer.
That Tan Looks Good Now... But What About Later?
I’m well aware that putting a 375º flat iron on my hair, clogging my pores with foundation, or laying out to get a couple shades darker aren’t necessarily my “healthiest” life choices, but we all make sacrifices for our beauty routines. Ideally, for whatever sacrifices you’re making you also have some kind of reparative treatments to counteract some of the damage you’re doing.
Skin is especially important because its the largest organ in your body. While a split end from a flat iron here or there isn’t going to kill you, not having a well-balanced skincare routine can seriously damage your skin, causing early aging and wrinkles. Although you may not see wrinkles, smile lines, or excessive dryness now after spending all day in the sun, they’re more than likely to pop up in the future. Preemptively treating issues now can lead to better skin in the future, so you can keep looking healthy and glowing no matter what age you are.
Are You Feeling Stressed Out? Maybe It's Time For A Little Pampering
Skin treatments aren’t meant to be done everyday, so there is a definitely pampering factor to them. However, skin treatments like facials lower stress levels and provide tons of relaxation which can have actual, tangible benefits to your health. Countless studies have shown the negative effects of stress on the body for your health, looks, and general well-being. Spa treatments completely relax you and the added face, arm, and neck massage that is included in our facials doubles the benefits. Massages release oxytocin into your body, which directly counteract stress hormones, making you feel immediately more relaxed.
Many of us have jam-packed schedules and remembering to take time to take care of yourself mentally often takes a back burner to school, jobs, and family obligations. Sure, being pampered sounds great. But seeing as many of us have fairly busy lives I’m sure feeling de-stressed is even more appealing. Keep this all in mind for the next time someone makes you feel high-maintenance for wanting to get a facial or any other skin treatment. You can tell them it’s just for your health, like eating a salad or hitting the gym.
Don't Have Any Skin Troubles?
While I love skincare products, I don’t have very problematic skin. Being in college full time and working comes with its own set of stress, so even though I may not suffer from severe acne or dryness, I am still looking to get healthier, better skin and lower my stress levels. So, I can still benefit from the relaxation and massage properties of skin treatments.
Even if you’re like me and don’t necessarily have any specific skin issues, facials and other skin treatments can still benefit you by mellowing you out, reducing acne or dark spots, and exfoliating the dead skin cells from your face. Which pretty much everyone has, unless you frequently get dermaplaning treatments or have somehow maintained baby soft skin as an adult. (If the latter's the case, call me. I have a few questions.)
Overview of The Oliver's Facial
The Oliver’s Facial is our signature hour long skin treatment. It's great for all skin types provides a well-rounded treatment for a variety of potential skin issues. The Oliver’s facial includes a skin analysis, complete cleansing, steaming, facial massage, exfoliator, mask, and moisturizer. The facial's exact steps and products are custom blended for your needs. So, let your aesthetician know of any specific issues you notice with your skin beforehand. The Oliver’s facial is a great starting point to skincare because even if you don’t know your specific needs or have more regular skin, there’s many different steps that cover all the bases.
I’d definitely recommend the Oliver’s facial for anyone who wants to improve their overall skin health but may not know where to start. It's also a great option if you have regular skin that you want to perk up.
Setting the Mood
To preface, I’ve never had a facial before. So I was definitely excited for some relaxation during my work day. (It’s worth mentioning that at this point my friends are more than jealous of my internship. I mean, a facial during work hours? How could they not be?) I was also looking forward to the prospect of having a new step in my skincare routine that would hopefully give me better skin.
Clients at Oliver’s know how busy it is here. While our location is large, we also offer a wide variety range of services. On a typical day there's customers in and out of the door every minute and it’s very lively in here. The spa room I was in completely cut off the typical salon noise and chatter from the outside. The room was dimly lit and relaxing music was playing. and I was tempted to take a nap before we even started. (The super comfortable bed I was laying in was more than a little enticing).
My Experience: The Products
One of our aestheticians, Jen, performed the facial on me. She started off by asking questions about my skin and any trouble areas I had. I told her I had fairly tame skin, not really any acne issues but some occasional dry skin. She then explained the steps of the process that she was going to do.
I'm not a big fan of strong smells or perfumes in my skin care products. Anything with too harsh of a smell reminds me of chemicals that I definitely don't want on my skin. All of the products that Jen used on me either had no smell, or smelled natural and light. I attest this to the use of Aveda and Jan Marini products. Aveda only scents their products with all naturally sourced ingredients and Jan Marini is a top innovator in research for new skincare products. (You can check out my blog on that here!) The products felt weightless and were getting fully absorbed into my skin.
My Experience: The Treatment
Jen first applied steam to my skin to open my pores. I was suffering from allergies that week so it helped clear my sinuses as well.
Between each of the steps Jen massaged my face which was very relaxing. Around halfway through the facial, I also received a small arm, neck, and upper back massage. Different layers of exfoliators, hydrating creams, moisturizers were applied with soft brushes and sponges to my face. Next, Jen applied a super hydrating mask. The mask was left for a few minutes to fully treat my skin. (This is the point where I nearly dozed off.) A final facial moisturizer was applied and left on. My skin absorbed it and I had no residue. Finally, the facial ended with an Aveda Lip Saver which was smooth and lasted for hours.
The After Effects: Was I Glowing Like A Goddess?
Immediately following the facial, my skin was extremely soft and hydrated. One of my pet peeves are the dark circles under my eyes after waking up. The morning after the facial, they were much lighter. My face looked brighter and rejuvenated and I felt refreshed and glowy for the rest of the day. I ran errands and met with friends without a bit of makeup on my face.
As for the next day, I definitely noticed my skin looking much nicer in the morning. The under eye circles I usually wake up with were less noticeable. I noticed my skin looking evenly colored, so I used less foundation. The foundation that I did wear sat on my skin more nicely. Because of this, I didn't have to use any powder or setting spray.
Unexpected Effects
One of the biggest differences I noticed wasn't a physical change from the facial, but a mental one. My face looked and felt so amazing afterwards that I became more aware of what I was doing to it. My skin is pretty resilient, so I sometimes slack on my daily skincare routine if I'm feeling lazy. Which I usually am. After the Oliver's Facial, I was dying to keep the glow I had so I've completely stepped up my skincare routine as a result.
All of the physical benefits of the facial aside, I'm more conscious of how I'm treating my skin. The facial made my skin look better in the short term, which made me want it to look better in the long term. Also, if your skin looks healthier, you may be able to cut out some of your makeup routine. A more strict skincare routine, using less makeup, and feeling less stressed out are all indirect perks I noticed from my facial. Eventually all these little changes can build up. So, the occasional facial has a ton of indirect benefits that give you better skin.
The Road To Better Skin Continues
Is a one-time facial going to give you completely flawless skin? Of course not. But they’re great for times when your skin may need a boost, like before a special event. They're also a great idea if you need a little kickstart to your skincare routine. Over time, I can absolutely see how repeated facials can improve the overall health of your skin and stress levels. Unfortunately, there is no cure-all that will give you better skin, de-stress you, and take 20 years off of your face. (And any product or service claiming to do that immediately is probably a sham.)
However, with periodic facials to rejuvenate and mellow you out a little bit you can definitely get better skin. In other words, if you’re planning on going to a tropical vacation and laying out in the sun for a week straight, it wouldn’t be the worst idea to “counteract” some of that “damage” with a facial right when you get home. You should do it for your health, right?
Thank you to our talented aesthetician Jen for treating me to the Oliver’s Facial!
For more information on how to get this service from one of our many amazing aestheticians, call us at (610) 366-8808 or book online.
Oliver’s Top 3 Beauty Brands
Most beauty lovers have spent more than a couple years narrowing down our favorite makeup, skin care, and hair care brands. Similarly, salons have to make decisions about which beauty brands they’re going to use for the services they offer. At Oliver’s, we want to make sure our customers receive an amazing experience. The different products we use all go into making sure of that. In this post, I’m going to give you a look into the different beauty brands Oliver's uses and sells and why they make our already excellent services even better!
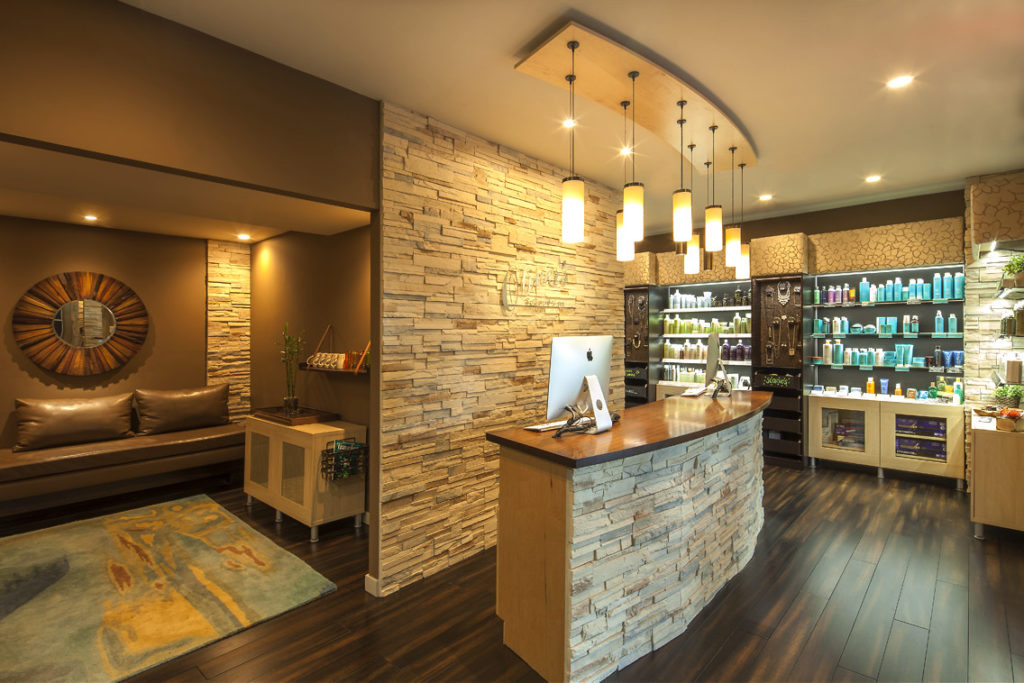
Here's our beautiful reception area and part of the retail space at Oliver's! It's the perfect place to snag some last minute products on your way out of the salon.
Want To Look Great Even After Your Appointment?
Getting your hair done is fun, relaxing, and exciting, but what's the point if you can't recreate how awesome you look and feel the next day? Our staff at Oliver's aren't just here to make you look amazing for the afternoon after your appointment. They're also here to educate and show you how to maintain your look so you can feel great 24/7.
When you get a service done, especially a new hairstyle, your stylist will be able to recommend specific products that can relieve some of the issues they've noticed in your hair. So, not only are you getting a new look, you're also learning how to maintain your new style and create it yourself at home. The products we sell mirror what the stylists are using while you're sitting in the chair. So if they recommend a product, it's because they use it day in and day out.
Personally, I'm not big on reading directions. It's a character flaw I'm willing to admit. However, its pointless to spend money on products and not use them correctly. If you use too much or to little, it can sometimes counteract the entire goal of the product. Also, depending on your own features, you may have to slightly alter how you use a product. To get the most bang for your buck, theres no one better than your stylist to tell you how to use what you're buying.
So Why So Many Products?
Oliver's was created on a holistic basis, meaning that all of our services are connected and we want every client to leave here feeling the best that they can. Oliver's retail area is extensive and we have products for pretty much anyone. If you have heat damaged hair, we have products for that. Want to prevent wrinkles and dry skin? We have you covered. Looking for a new outfit to go with that new haircut? We also handpick adorable clothes, accessories, and jewelry from New York. Oliver's is a well-rounded salon and spa that can totally be used as a one-stop shop for many of your beauty and fashion needs.
If you're a dedicated shopper like me, once you're on a roll nothing can stop you. So instead of driving all around the Lehigh Valley, it's pretty convenient to have almost all of your beauty needs in one place. While big name beauty brand stores like Ulta have a large range of products, not all the products there are salon quality.
What Brands Do We Use
While were use many different brands at Oliver's, our top 3 are Aveda, MoroccanOil, and Jan Marini.
Aveda is an all natural beauty brand committed to using organic ingredients. The brand was founded by Horst Rechelbacher, who is called “a pioneer of holistic beauty, and a champion of environmental responsibility.” Just like how Oliver's was the first full service salon and spa in the Lehigh Valley, Aveda was the first full service beauty brand. Aveda has a large range of products from makeup, skin care, and hair care.
MoroccanOil
MoroccanOil is primarily a haircare brand that uses Argan oil of Morocco in their products. Carmen Tal, the brand's founder, had her hair badly damaged after a color service. (Fried hair after a salon appointment? Everyone's worst nightmare.) She was away traveling and received a MoroccanOil treatment that revitalized her hair, and she knew she had to share it with the world.
Jan Marini
Jan Marini is an innovative skincare brand that constantly researches and tests new products that provide proven results. In skincare, they're one of the most respected brands because of how thoroughly they test their products. Other beauty brands make wild claims about what their products are capable of, but Jan Marini makes sure that any claim they make is based in fact.
Some Fun Facts About Our Brands:
- Aveda uses ALL naturally derived ingredients, and is cruelty free and never tested on animals.
- MoroccanOil's signature product, the Treatment Oil, has been raved about by celebs like Jennifer Lopez, Taylor Swift, and Penelope Cruz.
- Jan Marini products are medically validated, meaning they undergo lab testing to prove they work.
- Aveda is the first beauty company to use 100% post-consumer recycled packaging.
- MoroccanOil products use oil from the argan nut, which can only be grown in Morocco.
- Jan Marini products are cruelty free and not tested on animals.
- The aromas in Aveda products are created completely from natural plant and flower essences - no synthetic fragrances are ever used.
Already Have Your Go To Beauty Brands? Here's Why What Your Salon Uses Still Matters.
Imagine after a rough week you decide to treat yourself to a facial. Do you really want to spend that hour worrying about what the products being used might be doing to your skin? Regardless of age, background, or skin type you should be conscious of what chemicals you’re putting onto your skin and body. Beauty brands make broad claims about hydration, or anti-aging. In reality, many have chemical ingredients like parabens, synthetic colors, or harsh fragrances that can do more damage than good.
Reading every single ingredient on the back of every product you own isn’t realistic. (To be honest, I can't even pronounce most of them.) With so many skincare products out there, it can get stressful trying to find what’s perfect for you. After taking your specific skincare or haircare needs into account, it seems like theres a product for everything. Even if you eventually find that “perfect brand” for yourself, your salon probably isn't going to be using the exact products you use in your personal routine. When you visit Oliver’s, you don’t have to worry about what chemicals might be going into your skin or on your hair. For us, the number one goal is that our clients leave looking and feeling amazing.
Make Sure Your Products Are The Best Of The Best
Obviously, everyone’s skin and hair are different. What works for me might not work for you, but harsh chemicals often found in cheap products are downright damaging. At Oliver’s, we make sure to use products that are high quality and well-researched. Even though we may not use your go-tos, you can feel comfortable knowing the beauty products we use and sell are top of the line.
For more information on Aveda, MoroccanOil, or Jan Marini, click to check out their websites. If you’re interested in these excellent brands and the services Oliver's uses them for, call us at (610) 366-8808 or book online.
Tame Your Frizzy Hair
Let’s face it: all of us have been cursed at least once with the dreaded bad hair day, where nothing can seem to tame our frizz. There’s nothing worse than having to spend an extra 20 minutes of your morning calming your locks, just for them to revert back to their original shape by the end of the day. In this post, I'm going to explore one of the possible methods to stop frizzy hair: the Keratin Smoothing Treatment.
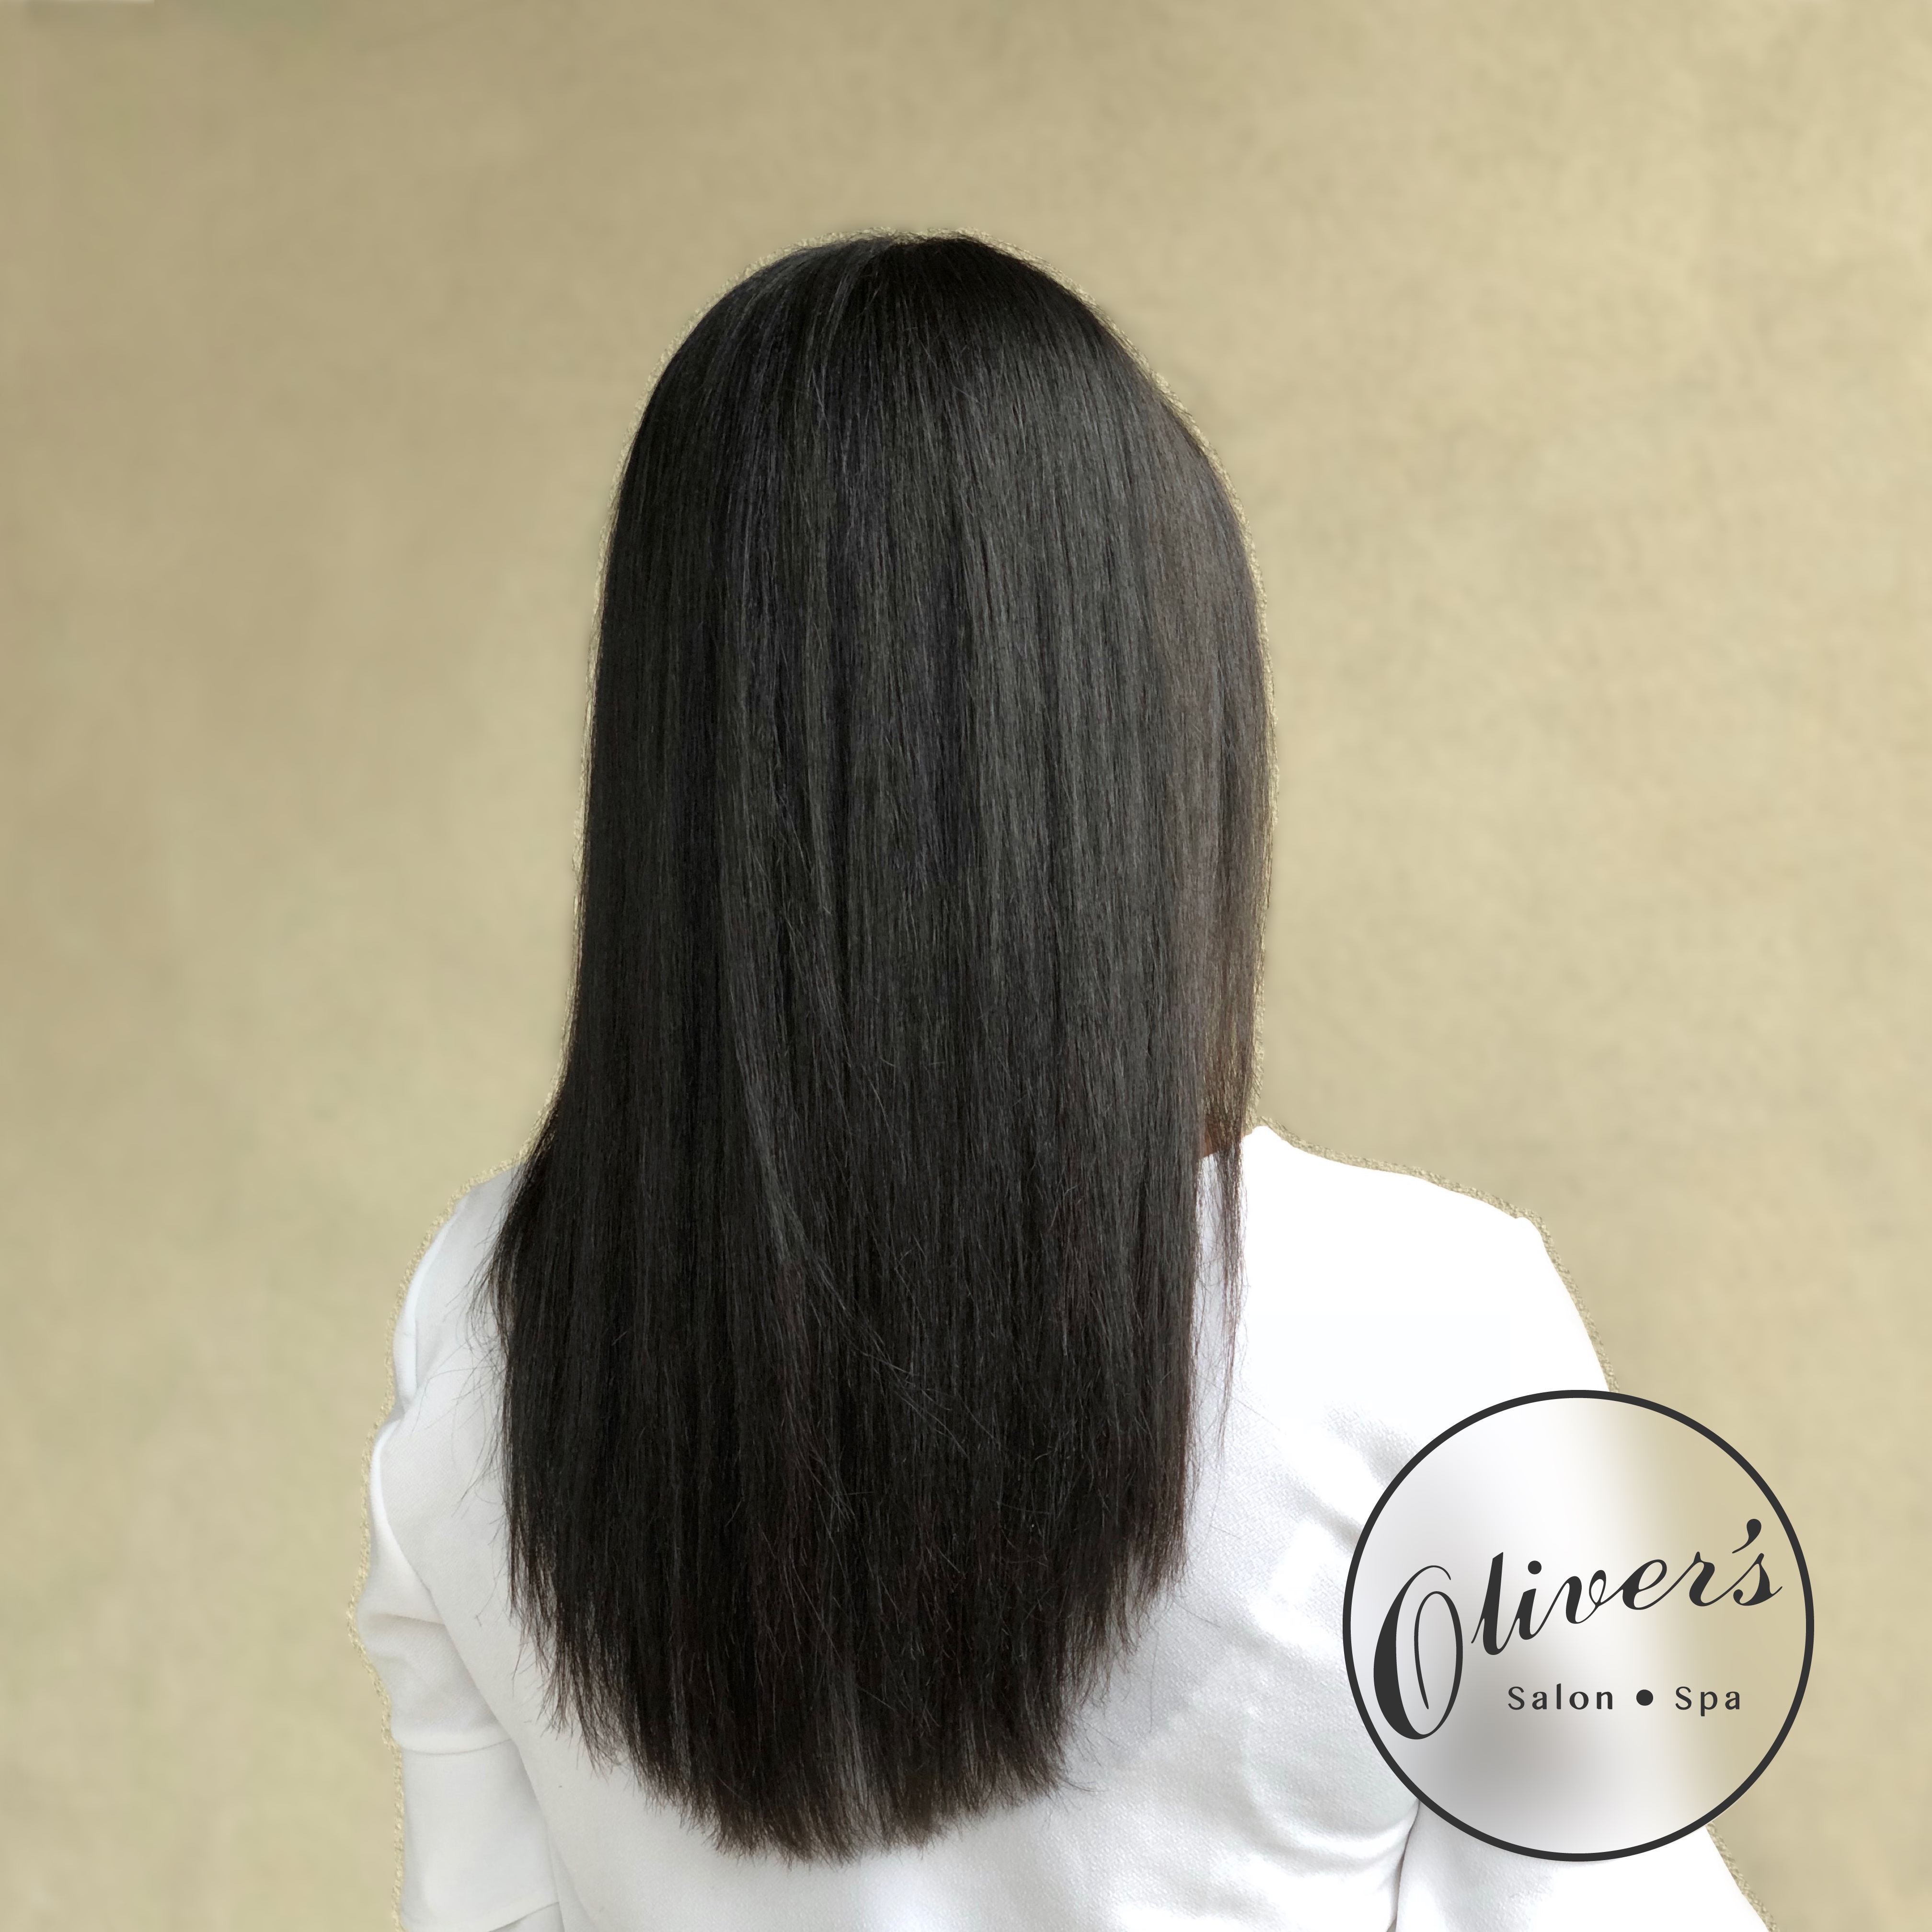
My hair directly after receiving my Keratin Smoothing Treatment! It looks way more healthy, smooth, and shiny, and seems like it's grown inches in just 90 minutes.
What makes hair frizzy?
Sun, heat, age, and environmental factors cause a reduction in keratin in your hair, which leads to your hair being drier and more porous. This causes the strands to take excess moisture from the air, producing frizz. (Hence why your hair may be extra unruly on those especially humid days.)
How to get rid of frizzy hair?
The best way to tame frizzy hair is by replenishing the keratin in your hair. But what is keratin? Keratin is a natural protein in your skin, hair and nails. In your hair, keratin gives your strands structure and provides a shield from the elements. When hair is damaged physically, the keratin protein is the first to go. So by replenishing keratin, you’re able to condition, strengthen, revitalize and repair damage. This results in shinier, bouncier, and more healthy looking hair. However, you can’t add more keratin back into your hair with wishful thinking.
LUCKILY, Oliver’s Salon and Spa offers an awesome service called the Keratin Complex Smoothing Treatment.
This treatment is a professional hair smoothening service that uses the reparative protein keratin. (Side note: There are multiple brands of the Keratin treatment on the market, but it is worth noting that this is a completely different service from many of the Brazilian Blowout/Brazilian Hair Smoothening treatments.)
How does that treatment work?
First and foremost, the treatment must be done in-house by a trained stylist. The stylist will perform a simple four-step process, outlined below. (Check out the end of the blog for my before and after!) Oliver's has several amazing stylists who are certified in performing both the Natural Keratin Smoothing Treatment and Keratin Express Blowout. Now, for the treatment process:
1. Your stylist will use a special deep-clarifying shampoo and wash your hair twice with it, preparing the hair for treatment and to remove residue and buildup from previous hair care products.
2. The selected smoothing treatment is applied.
3. The hair is blow-dried.
4. A hair straightener is used to seal in the treatment for a smooth, silky finish.(Steps may vary depending on the service performed)
The entire process takes about 90 minutes and leaves your hair looking fresh and fabulous. Everyone’s hair is different, so the longevity of the treatment varies on factors such as lifestyle and at-home maintenance. Oliver’s offers two methods for the Keratin treatment: The Natural Keratin Smoothing Treatment which lasts up to five months, and the Keratin Express Blowout which lasts up to six weeks. To prolong the amazing results from this treatment, make sure to use sodium chloride-free and sulfate-free shampoos and conditioners following your appointment.
My Experience
Now it wouldn’t be nearly as helpful or informative of a blog if I didn’t actually test the Keratin Smoothing Treatment out myself, right? I received the Keratin Express Treatment, which took about an hour and a half and the results are expected to last 6 weeks. I have naturally curly hair that is very prone to dryness and frizziness, especially during the summer. I generally keep it straightened to cut down on styling times and products, however this gives me even more dead ends and dryness. So, I was a pretty ideal candidate for the treatment because I had more than enough experience with frizzy damaged hair.
To start off the treatment my hair was washed twice with the Keratin clarifying shampoo. In my own hair care routine, I also use a clarifying shampoo for buildup. This makes my hair extremely dry, so I ALWAYS have to condition afterwards unless I feel like fighting with my hairbrush for the next hour. Naturally I was a little worried when I learned we wouldn’t be able to use conditioner prior to brushing the keratin treatment through my hair. I immediately felt bad for Hannah who would have to deal with the endless knots that were likely to form after shampooing my hair. However, when she began to brush the keratin through it glided easily through each of the sections, already making my curls much more manageable.
Next the keratin was blow dried into my hair. I usually blow dry my hair following a shower which generally causes it to grow immensely, but while Hannah was blowing it out, it was much smoother and a fraction of the size. Lastly, Hannah straightened the Keratin into my hair. This was an easy process and only took about 20 minutes. Altogether, the Keratin Complex Blowout was an extremely quick and easy treatment that hardly strayed away from a normal morning routine. As someone who has tested out a couple different types of relaxers and treatments, this was by far the easiest.
The Results
It was a rainy day so typically by the time I’d walk from the salon to my car at the end of the day, in the rain and humidity would have made my hair noticeably frizzier/larger by the second I closed the door. Today, my hair stayed completely in place and didn’t give me any trouble.
When I wake up, my usual morning routine is to take my hair down, brush it out, and lightly straighten the front pieces and ends which get slightly curly in my sleep, usually taking me about 15 minutes. The morning following the blowout I was able to just wake up and go because my hair was silky and much more manageable, and didn’t curl up at all in the night. (Anything that will help me to get a couple extra minutes of sleep in the morning I can 100% get behind.)
The weekend directly following my treatment was the ultimate test: I went camping. The weekend’s extreme humidity, thunderstorms, and the lack of all my hair products around me was daunting. While I love the outdoors, my hair was not built to be out in the wilderness without a flat iron. I expected to look like a complete mess by the end of the weekend, but that definitely wasn't the case. My hair stayed straight and in place, even through an afternoon hike in 90 degree weather.
I’m about a week out from the day I received my treatment and my first impression is definitely a home-run. I’ll post a follow up blog with how it’s held up over the next few weeks, and I’m looking forward to seeing how it goes!
Convinced Yet?
I would absolutely recommend the Keratin Complex Blowout treatment to anyone, especially those with wavy, curly, or hard to manage hair. Not only does it make your hair look and feel nicer in the short term, but it will cut down on the need for frequent styling with excessive heat, which will improve your hair’s health in the long run. If you’re new to hair treatments and want something with a shorter longevity, the Express Blowout is a great option to try before committing to the full treatment. You can get a feel of how the treatment will affect your personal hair type, and if you’re anything like me you’ll be dying to get the full treatment ASAP.
The Keratin Complex Blowout is an amazing treatment that will revamp your hair and cut down on future styling time, making your morning routine all that much easier. So the next time you wake up and can’t seem to tame your mane, give us a call to schedule your smoothing treatment!
For more information on how to get this service from one of our many talented stylists, call us at (610) 366-8808 or book online.

